Customization & Sampling
Button Loops on a Lace Back: Size, Spacing and Load Path
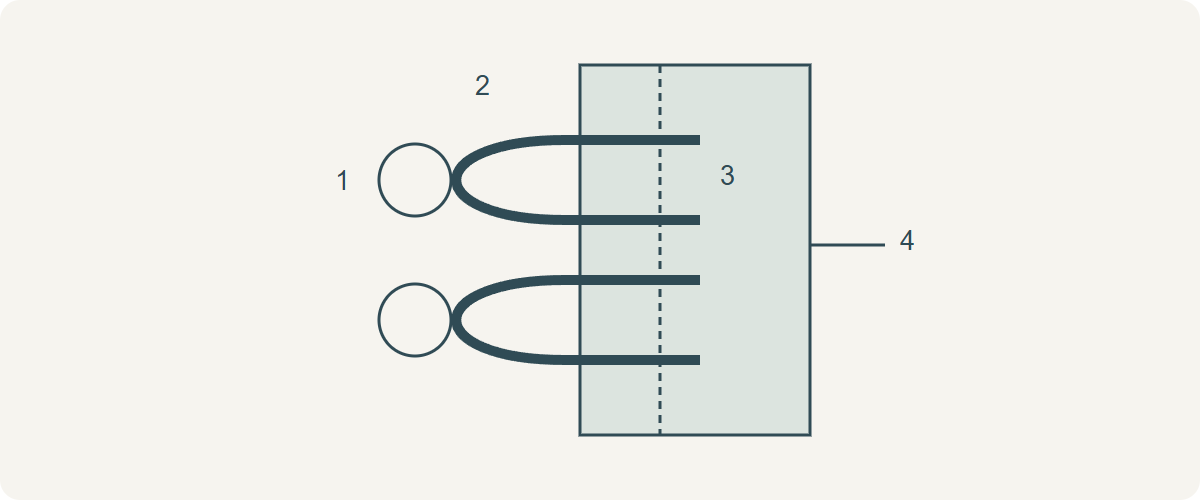
Fit a lace-back button loop around the actual button, then capture both tails in a continuous supported seam or placket. Set spacing on the finished opening, check for gaping in the worn position and keep decorative loops distinct from the closure that carries the garment. Button diameter alone cannot determine loop length because button thickness, shank, loop material and the intended overlap also matter.
Decide what actually keeps the dress closed
A row over a zipper may be decorative. A row forming the only back closure must transmit opening forces through the loops, their tails, the carrying seam, the buttons and the opposite edge. Draw that entire route. Open net with isolated flowers is not a continuous support simply because it covers the seam. A fitted bodice may need a separate structural closure; loops should not be expected to repair inadequate fit or support.
Choose whether edges meet, overlap or leave a deliberately exposed gap. A modesty underlap can control visibility but only carries force if designed and secured to do so. Mark the finished garment edge, overlap line and button centres on the pattern. Changing an ordinary buttonhole placket into loops can alter those relationships, so revise the facing and finished width with the patternmaker first.
Fit the button through a finished trial loop
The Sewing & Craft Alliance starts loop sizing with the real button and a sewn sample. Wrap the selected finished cord or turned tube around the button, mark the garment-edge positions on both legs, and leave tails long enough for the intended capture seam. Include the tube seam and any elastic behaviour. Test passing the button through and returning to the intended closed shape without dragging the garment edge.
A flat disc and a thick covered button of the same diameter can need different loops. Too loose may release or expose more of the opening; too tight can damage the cord or make dressing difficult. Elastic can help a button pass but can also create a different loaded appearance. Assess recovery and whether it stays engaged during the required movement rather than assuming elastic is automatically safer.
Technical references
Calculate positions between actual end centres
Fix the first and last button centres relative to the neckline and waist finish before dividing the run. Hypothetical example: their separation is 180 mm and the design uses 10 centres. There are 9 intervals, so an evenly spaced row uses 180 ÷ 9 = 20 mm centre-to-centre. This is layout arithmetic only. It does not establish suitable spacing for a particular button, support strip or amount of tension.
Transfer the accepted spacing to a removable guide or clearly marked carrying edge. Keep each pair of tails at its tested edge mark, not at an estimated visible loop peak. Check buttons do not collide and fingers can reach the row. A bought loop tape with fixed repeat may not fit those positions; select a compatible tape or revise the design instead of stretching the whole tape to reach the final mark.
Capture both tails permanently
Mount an appropriate stable carrying strip or facing as the garment design requires. Form loops with their curves towards the garment interior while the raw tails extend through the seam allowance, so turning the finished edge will expose the intended loops. Baste in the allowance to hold position, then sew the facing or placket seam through the continuous carrying material and both tails of every loop. Basting is not the permanent anchor.
Turn and inspect the trial with temporary guides removed. Verify that no tail slips out when the row is operated and that seam trimming has not severed the capture. Gold & Skye’s original Violette tutorial shows a loop row captured by its placket and checks actual button fit; its dimensions belong to that pattern. A lace-back construction still needs its own support, visibility and load trial.
Technical references
Use symptoms to revise the closure
Assess the row over the intended foundation in the worn shape, including dressing access, required reach and sitting movement. Do not define a universal pull force in a workshop article. Agree any required formal closure or seam assessment with the garment team. Keep the complete successful construction as a reference, including button, loop material, support, capture depth and spacing; changing one can reopen fit and security checks.
| Observed issue | Inspect first | Possible revised trial |
|---|---|---|
| Gap between buttons | Finished overlap and edge support | Revise underlap or spacing with the pattern |
| Loops pull out | Both tails and permanent capture | Rebuild supported seam, not extra stitches in holes |
| Buttons escape | Actual loop fit and recovery | Different loop geometry or material |
| Row forms waves | Stretched support or unequal feed | Rebuild relaxed with aligned references |
Discuss your embroidery project
For an All4Lace back-panel enquiry, send the opening sketch, actual button and loop reference, supporting layer and whether the buttons are functional or decorative. Include the planned finished edge and any underlap in the sample brief.
Contact Zhijin