Sourcing & Orders
How Sheer Is an Embroidered Fabric? A Practical Opacity Review
To review how much an embroidered fabric reveals, look at representative decorated and open areas under the conditions the garment will face. Keep the background, lighting, layers and sample state explicit. A bright catalogue photograph or a dense-looking flower cannot establish that the whole garment will provide the intended coverage.
Define what must remain visible or covered
Begin with the garment region: a sleeve, upper bodice and skirt may have different requirements. State whether an open effect is intentional or whether a particular underlying area needs coverage. Avoid an unexplained instruction such as “make it opaque”; the reviewer needs to know the intended layers and where the question applies.
Identify the area of the actual sample under review. Embroidery can leave large openings between decorated motifs, so include both the motif and the surrounding ground. If the sample contains only the centre of a dense flower, ask for a wider representative area before making a decision about the design.
Use simple, repeatable backgrounds
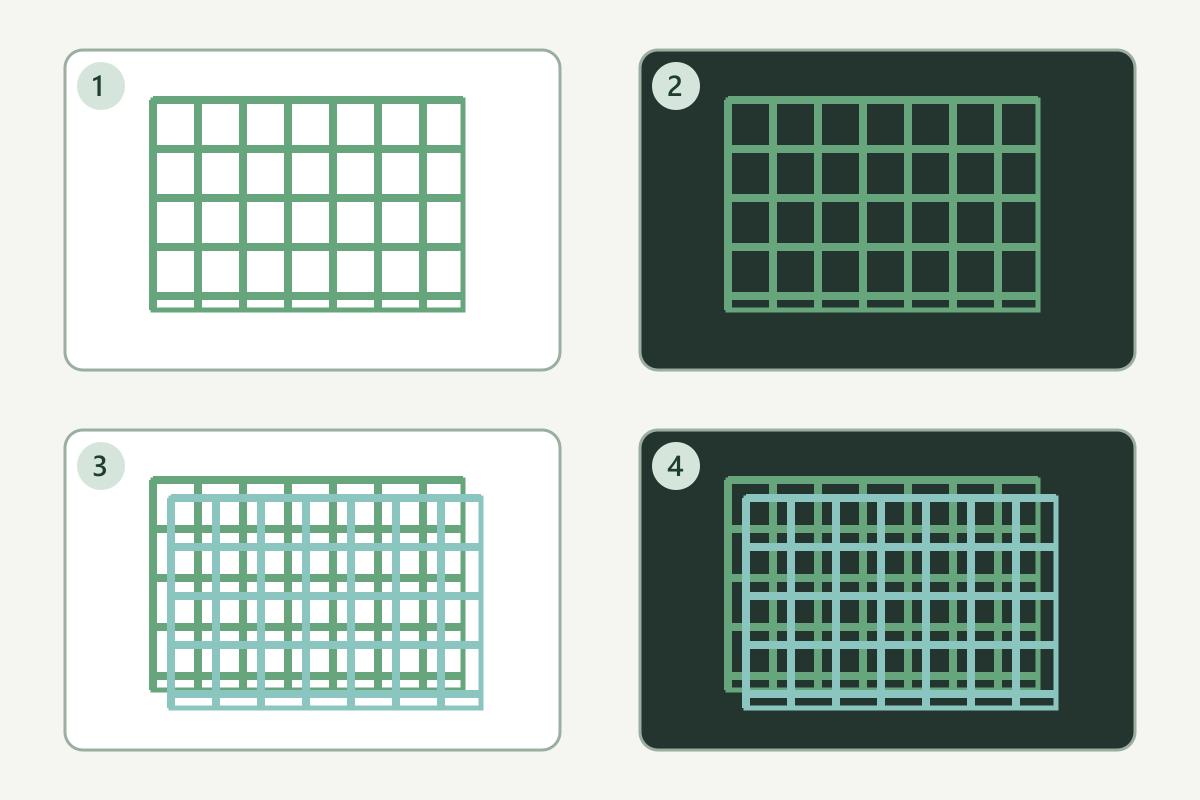
Place the relaxed sample over a plain light background and then a plain dark one, keeping orientation and distance comparable. This helps describe where the background remains visible through the material. Use the same sample region for both views, with an external marker if needed. Record any support between the fabric and background.
This comparison is not a percentage measurement and does not imitate every wearer or lining. Next, review the material over the actual intended underlayer. State whether it is touching the lace or separated from it, since a loose suspended view and a flat layered view are different setups. Do not substitute a photograph of another colourway without saying so.
Check relevant lighting without changing every variable
Compare under a consistent front-lit arrangement first. If backlighting is relevant to the garment’s use, make it a clearly labelled additional view. Keep the background and sample state the same while changing the light arrangement. Record the situation in plain language, such as indoor front light or light behind the hanging sample.
A phone may change its exposure between frames, making a simple side-by-side comparison less reliable. Retain the original files and note any camera or exposure changes you know about. A photo can point out an open area for discussion; it does not establish a certified light-transmission value or a guaranteed result in all lighting.
Review added layers as their own construction
If the proposed garment uses a double layer, test the intended overlap rather than assuming that two pieces automatically solve the coverage question. Record whether motifs are aligned or offset, which side faces outward and whether the layers are free or temporarily fixed. Look for remaining open channels across the combined area.
Then review the planned construction at the garment position, including any shape or movement that changes the local view. Do not stretch delicate material for a photograph to suggest a different effect. Record whether it is relaxed, draped or held by the proposed pattern arrangement, and ask the garment team to assess the actual trial.
Use a small observation matrix, not an invented rating
A useful record names the material, sample region, background, lighting and layer arrangement, then describes what remains visible. The table below is a proposed review plan. It contains no claimed results for All4Lace materials; fill each observation only after seeing the corresponding sample setup.
Decide whether the proposed construction is suitable, needs an underlayer change or needs a larger garment trial. Keep that decision tied to the checked area and conditions. If the order requires a numerical optical property, agree a suitable specialist method and scope rather than converting a visual impression into a percentage.
- State garment area and coverage intention.
- Include typical decorated and open regions.
- Label background and light arrangement.
- Identify layers, overlap and sample state.
- Record observations before the decision.
| View to prepare | Keep fixed | Observation to record |
|---|---|---|
| Single layer / light background | Sample region and orientation | Where does the background show? |
| Single layer / dark background | Same sample and distance | Which open areas remain visible? |
| Proposed double layer | Overlap and facing direction | Are open areas still connected? |
| Garment trial / intended underlayer | Agreed construction and light | Does this region meet the brief? |
Discuss your embroidery project
Share the garment area, intended underlayer and coverage question with All4Lace so the sample review can be prepared around your actual construction.
Contact Zhijin