Materials & Applications
Flat vs Cupped Sequins: Compare the Profile Before Choosing the Surface
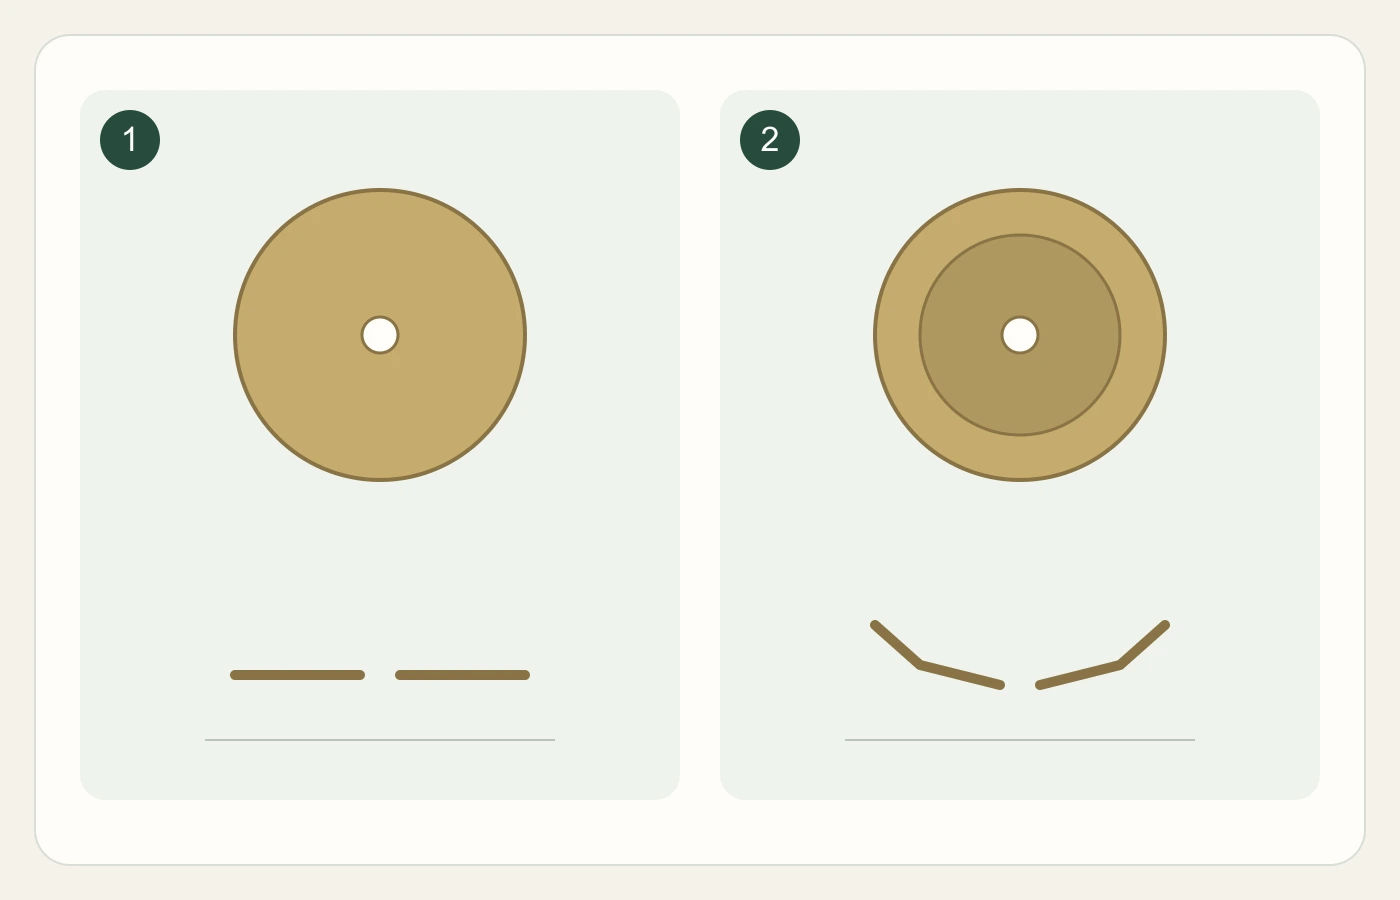
Flat sequins have a comparatively planar profile; cupped sequins have a shaped, dish-like profile. That difference concerns the form of the component, while its colour, finish and arrangement are separate choices. Start by comparing the individual shape and then the assembled surface on the garment. A cup can make the rim and centre more visually distinct, but the selected sample determines whether that effect supports the design.
Identify the profile before describing the effect
Sequin maker Langlois-Martin lists flat and cup sequins as distinct forms. For a buying brief, add a face view and a low side view to the chosen form. The face view establishes the outline; the side view shows how the centre and rim relate. State which face is intended to be visible after attachment.
In the cover diagram, 1 represents the flatter component and 2 the shaped cup. These are starting shapes for discussion. Once fixed to a ground, the visible profile also depends on how the component sits. Keep a loose reference where available alongside the sewn sample so the team can distinguish the component form from its assembled position.
Technical references
Compare what the shape contributes
Keep the proposed colour, finish, outline and layout as similar as practical while comparing profile. If several things change together, describe the result as a comparison of two complete surfaces. The table helps isolate the design question without turning flat and cupped into quality grades.
| Review point | Flat reference | Cupped reference |
|---|---|---|
| Individual form | Broadly planar face | Centre and rim at different levels |
| Motif reading | Observe the continuity of the face | Observe the rim-and-centre relationship |
| Assembled position | Check tilt and overlap | Check cup orientation and overlap |
| Decision record | Describe the wanted surface | Describe the wanted relief |
View the same arrangement from more than one angle
Place both samples on the intended background and use the same light position. First examine them front-on, then turn the samples together and view them from a shallow angle. Compare the outlines and the areas that become prominent as the viewing position changes. Retain both the overall view and a detail of the same motif.
Avoid judging profile from the brightest frame alone. For a flower motif, inspect the centre, petal edge and intervening ground separately. A preferred edge effect might accompany an unwanted emphasis in the centre. Mark those locations directly on the design so a revision can address the area that matters instead of replacing every sequin.
Use a garment example to choose the role
Imagine a jacket panel with a narrow outlined flower and a quieter surrounding field. One comparison can place flat components in both areas; another can keep the field unchanged and introduce cupped components only along the flower. The question is whether the outline becomes clearer in the intended garment view, not whether the cup is automatically more luxurious.
At a fold or under an overlapping garment layer, place the actual sample in that position and inspect how the surfaces meet. For an exposed panel, also step back to the viewing distance used for approval. These are design checks on the proposed combination; select the reference that gives the intended relationship between detail and overall surface.
Approve the component and the assembled surface together
Record the component form, visible face, attachment reference, colour and garment location. Keep size, finish and coverage in their own fields so a later profile change does not silently change the rest of the brief. If both forms are used, map each one to its area and retain the approved mixed sample.
Describe revisions with observable language: keep the field planar, retain the outlined rim, or change the cup orientation in the marked area. Evaluate the selected construction under the intended handling and care procedure agreed for the garment. Retain those observations with the sample rather than assigning a care rule from the words flat or cupped.
Discuss your embroidery project
Send All4Lace your preferred profile, face and side references, garment position and colour requirements, with quantity, so we can clarify the component form and assembled surface to discuss for sampling.
Contact Zhijin