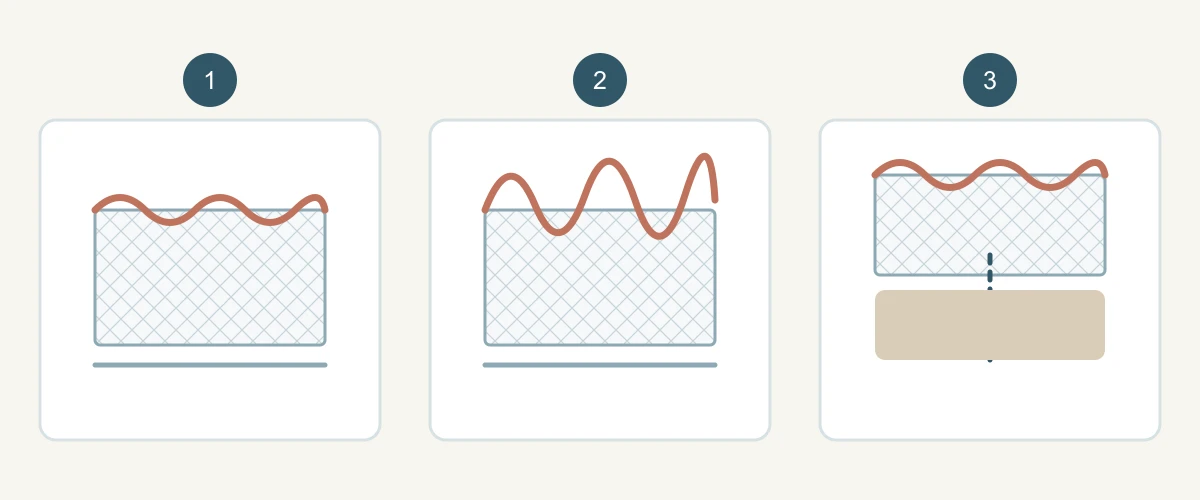
A scalloped lace border can look straight in a clipped product photograph yet lift, roll or ripple when it hangs on a garment. Those appearances do not all have the same cause. A useful approval separates the free border as supplied from the border after cutting, handling, attaching and adding the proposed lining. Compare the same labelled sample at each stage before deciding whether the lace, pattern or sewing operation needs attention.
Name the appearance before naming a cause
First distinguish an edge that rolls inward across its width, scallops that rise in alternating waves, an attached seam that gathers, and a border that merely hangs on a curved panel. Note whether the lift occurs along the decorative scallop, the plain header or the garment cloth beside the stitch line. Take face and side views with a scale and show one entire repeat. A close-up can exaggerate a tiny natural relief or hide a repeated distortion.
Place the uncut sample flat without stretching it and let it rest under its own weight. Then hold it in the planned garment orientation. Seamwork suggests checking whether a fabric edge curls at rest and whether gentle stretching changes it, in the context of knitted fabrics. That observation is a useful question for lace too, but the source does not prove that every lace border rolls for the same reason. Record what this particular sample does.
Technical references
Compare stages in a controlled order
Label four views: as received, after careful cutting, after temporary positioning on the intended base, and after a representative permanent join. Keep the same sample orientation, lighting and support surface. If the edge looks flat when free but waves only when joined, do not reject the material before checking the assembly. If it curls before any stitch is made, a machine tension change cannot explain that first observation.
Use the actual planned lining and border length. A narrow swatch pinned onto a long curved hem may conceal the way repeat points accumulate around the circumference. Avoid aggressive stretching or pressing to create a pleasing photo; the order must be reproducible in ordinary handling. Record whether the header length and the garment reference path are equal before diagnosing a wave.
| Stage | Record | Question |
|---|---|---|
| Free border | Face and side view across a full repeat | Is the curl already present? |
| After cutting | Same segment and orientation | Did handling change it? |
| Temporarily placed | Actual base and lining | Does the geometry force a wave? |
| Permanently joined | Face, reverse and hanging view | Does feeding or tension add distortion? |
Separate edge curl from sewing pucker
Coats describes several possible causes of seam puckering, including tension, unequal feeding and fabric or thread instability. That guidance concerns seams generally, so it cannot diagnose a lace hem from a photograph. Check whether the ripple is confined to the stitched path, whether the base cloth gathers, and whether the lace and base lengths were matched before sewing. A pure free-edge curl and a sewn-in pucker may coexist.
Have the sewing team compare a short joined trial with only one documented change at a time. Never cut open a customer sample merely to test a theory: the destructive checks in technical sewing guidance belong to an agreed spare trial handled by qualified staff. A smoother seam after a trial change still needs confirmation on the whole intended construction, since a small straight sample may miss the actual curved hem.
Technical references
Approve the relevant joined panel
Seamwork’s lace-hem tutorial aligns a border point to a garment reference line before attaching it. Use that as a principle of repeatable positioning, not as a mandatory stitch width or sequence for another design. On the proposed garment panel, mark several scallop peaks or valleys, temporarily set the border, then compare whether their visible depth stays consistent around the curve.
Inspect at the viewing distance of the garment and up close where the hem might touch skin or an underlayer. Photograph it hanging after normal handling, plus a reverse view that shows how the header is supported. If a border appears flat only when pinned rigidly to a board, it has not passed a hanging garment check. Approve a named sample and specify which view or construction change it represents.
Technical references
Specify the decision and send a useful enquiry
Will steam always remove curling? No universal answer follows from the word “lace”; heat, moisture and pressure can affect fibres, embroidery, decorations and dimensions differently. Ask for care and finishing limits for the exact article, and trial any treatment on an expendable piece before approving it. A temporary flatter edge after pressing is not proof of shape retention through garment handling or care.
Can a rolled edge be accepted? Possibly, when its amount and direction suit the design and the buyer has signed off a representative hanging sample. Send the lace reference, full border repeat, garment hem path, base and lining, whether the issue occurs before or after stitching, labelled face and side photographs, and the decision criterion. Request separate observations for material and assembly rather than a generic promise that it will lie flat.
Discuss your embroidery project
Send All4Lace the border reference, full-repeat photo, intended base and lining, and labelled views before and after attachment. We can discuss a representative sample that shows the edge as it will be worn.
Contact Zhijin