Customization & Sampling
Mitered Corners with Lace Trim: Build the Turn Before Trimming
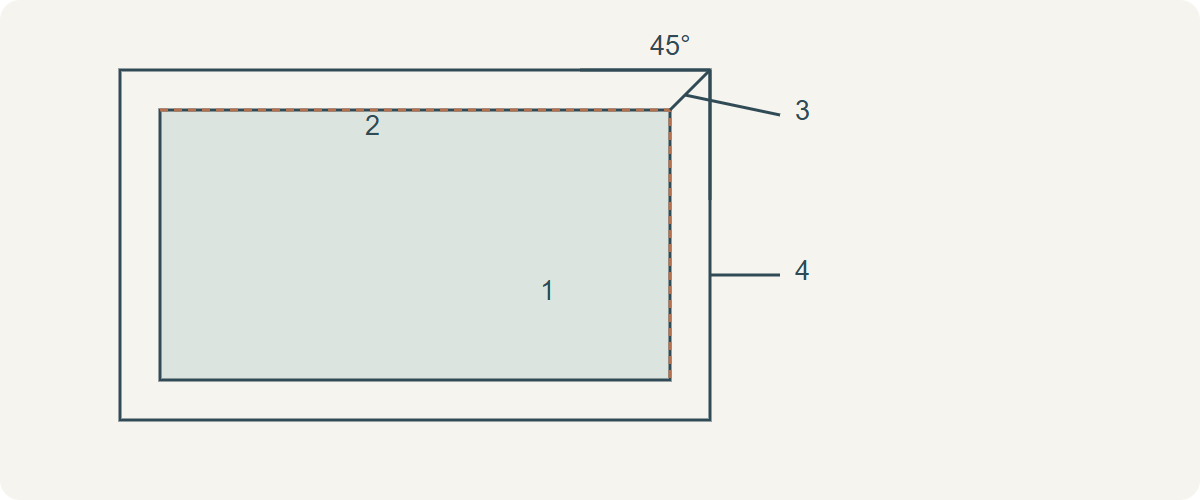
To miter lace trim around a square corner, form the complete turn at its finished attachment position, align both headings and the decorative edges, then establish and secure the diagonal junction. Do not cut away the triangular surplus first. A folded miter retains extra layers; a cut miter needs a reliable permanent seam across the full joining edge. A narrow upper heading alone cannot secure a wide open decorative end.
Separate the garment corner from the trim corner
Mark the finished fabric edge and the line where the lace heading will be attached. Then draw the trim’s outer decorative boundary. These paths have different lengths around a turn. Pulling the heading straight around a square corner can draw in the outside edge, or leave an uncontrolled fold. Turning an equal-width strip by 90° produces a 45° meeting line when the two arms are placed symmetrically.
Scallops do not form a constant-width rectangle, so nominate whether visible width is measured to a peak, valley or another repeat reference. Choose which motif should occupy the corner before marking the turn. If two flower tips collide or a hole falls on the intended join, shift the repeat on a spare trial or select another trim instead of treating the diagonal as compulsory.
Choose a folded turn or a supported seam
For a soft thin trim, an uncut folded miter may avoid exposed cut ends if the complete folded triangle can be held unobtrusively. Trial the front and reverse, because an upper attachment seam can leave the lower fold free to unfold. Provide permanent securing wherever the decorative folded section needs restraint, using connected material. Reject a fold that is bulky, stiff, unstable or too conspicuous through the fabric.
For a cut miter, inspect the entire proposed joining edge before cutting. Connected lace may permit a carefully secured seam or motif overlap. An open trim with no continuous route can need a discreet permanent support or a different corner design. Any support changes transparency and handle, so include it in the trial. More stitches over empty holes do not create a complete joint.
Form a full-size corner on spare material
Make the garment’s finished corner in the actual fabric and support, including its hem thickness. Mark the corner point and straight attachment lines on both arms. Lay the lace along the first arm without tension, form the second arm over the corner and adjust until both headings follow their marked paths and the outer edges lie flat. Baste the whole arrangement, retaining the surplus.
Mark the observed diagonal or motif-lap route while the arrangement is flat. Remove it from the garment trial only if necessary to construct the joint, retaining alignment marks. The historical School Sewing lace example similarly establishes and bastes the diagonal before trimming. Its old narrow seam allowances are not settings for modern open mesh or embellished lace.
Technical references
Secure every part of the junction before release
Sew the permanent folded securing or supported seam along the route established on the trial. Inspect the entire width, including the decorative outer edge. A seam that is secure at the heading and loose at the scallop remains unfinished. For a cut construction, trim only the surplus that lies beyond the retained seam allowance or overlap demonstrated to be sound; protect all retained anchors and finish the resulting edges as the construction requires.
Reposition the completed corner on the finished garment edge and attach the heading along both arms through connected material. Keep the turn supported on the table and do not pull it flat under the foot. Remove temporary basting designated for removal, let the assembly relax and check that the joint remains held without it. Stitching the heading cannot replace missing permanent work at the decorative diagonal.
Do not confuse an inset hem with a lace seam
SewGuide’s inset-trim tutorial forms a miter in the surrounding fabric hem. That is valuable for understanding a fabric frame around lace, but it is not evidence that an open lace strip can carry a diagonal seam anywhere. Decide whether this project turns the fabric frame, the lace itself, or both. Their joins may need separate construction sequences and allowances.
Hypothetical example: a 40 mm visible trim has only a 5 mm continuous heading. A secure seam in that 5 mm leaves 35 mm of decorative end still requiring a designed finish. The difference, 40 − 5 = 35 mm, is a warning to inspect the whole width, not a rule for adding a 35 mm support strip. If that remainder cannot be held acceptably, use a different corner solution.
Technical references
Approve flatness and the complete reverse
Compare the relaxed corner with its marked geometry and the two straight runs. Examine hard stacks against skin or lining, loose points, retained anchors and any care needed for the finished article. Keep the successful spare corner as the construction reference. Other angles, unequal trim widths or heavily beaded borders require a new layout; the equal-width square example does not supply their joining angle or seam method.
| Symptom | Likely check | Next trial |
|---|---|---|
| Outer edge drawn tight | Different path lengths at corner | Re-form the full turn without tension |
| Corner too bulky | Retained fold and decoration stack | Supported cut joint or different border |
| Lower decorative tip loose | Permanent full-width restraint | Redesign joint; heading seam alone is insufficient |
| Motif breaks visibly | Repeat location and join path | Shift repeat before cutting new material |
Discuss your embroidery project
For an All4Lace border sample enquiry, send the finished corner angle, visible trim width, attachment overlap and photographs of both trim edges. Request enough material for a full corner trial and a spare repeat.
Contact Zhijin