Materials & Applications
Detachable Lace Collars: Shape, Closure and Sample Approval
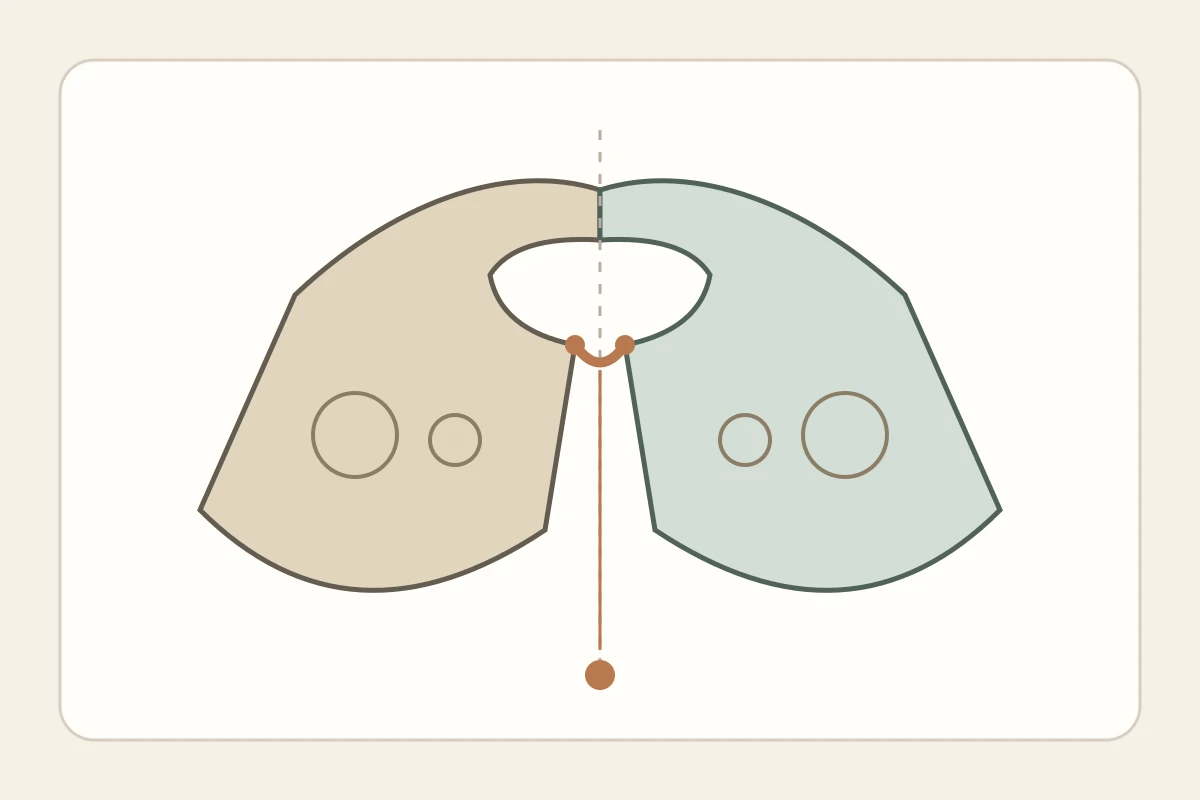
A detachable lace collar is a separate accessory worn around the neckline rather than permanently built into a garment. Its decoration can look convincing on a flat table and still sit poorly over the intended dress or blouse. Begin with the relationship between collar, clothing and fastening. Approve a complete wearable sample, not just an attractive embroidered shape.
Define the garment underneath first
Specify the actual garment neckline, shoulder line and fabric surface that the collar will cover. A collar designed over a closed round neckline should not automatically be approved for an open shirt. Record whether the accessory overlaps the garment edge or leaves it visible, and where the front points should finish when worn.
Use the intended garment for review whenever possible. If several garments are proposed, list them separately and identify a primary reference. One successful pairing does not establish a universal fit. The maker’s detachable-collar tutorial cited here illustrates a separate accessory with ties; its pattern dimensions and construction are not general specifications for embroidered lace.
Technical references
Review balance without forcing every motif to mirror
Mark centre back, both front ends and the intended wearing side on the pattern. Decide whether the design needs mirrored motifs, a continuous directional sequence or deliberate asymmetry. These are different visual briefs. Reversing a photographed motif on screen does not confirm that the supplied physical pieces can be turned over or produced as a matching pair.
Inspect the two sides together over the garment. Compare their apparent length, outer silhouette and the distribution of prominent flowers or dense embroidery. A large flower near one front point may need a deliberate counterpart or an agreed asymmetric composition. Keep the pattern marks visible in review photos so that a balance correction is not confused with a change in collar size.
Treat the fastening as part of the design
Choose a proposed fastening position before approving the decorative border. Ties, a button arrangement or a separate clasp need different space and attachment discussions. Ask the garment maker how the chosen method will be secured to the actual sample. Neither a lace photograph nor an attractive closure sketch proves that the attachment is suitable.
Review opening and closing while the collar is on the intended garment. Observe whether the front ends separate, overlap unexpectedly or shift off centre. Check the reverse where a fastening meets embroidery, and discuss contact with the neck, hair and jewellery. These are sample observations, not claims of comfort or durability testing.
Use one record for shape, decoration and assembly
Keep each decision separate. A finished sample can be visually approved while its closure remains unresolved; the order record should show that distinction rather than a single unexplained approval tick.
| Review area | Record before sampling | Observe on the assembled sample |
|---|---|---|
| Neckline relationship | Reference garment and intended overlap | Visible garment edge and collar position |
| Paired decoration | Mirrored, directional or asymmetric layout | Left–right composition when worn |
| Front closure | Position, proposed method and maker responsibility | Alignment and access when opening |
| Reverse and outer edge | Proposed finishing and visible underside | Exposed ends, contact areas and edge appearance |
Example: a collar for one blouse and one dress
Suppose a design team wants an ivory embroidered collar to accompany a dark blouse and a pale dress. This is a hypothetical brief, not a customer case. The blouse is selected as the primary fit reference. The team first approves the paired outline and front fastening on that blouse, then records a separate appearance check over the dress.
If the collar reveals an unwanted strip of the dress neckline, the team must decide whether to change the collar, accept that pairing or limit the accessory to the blouse. Moving a fastening to hide the strip may also alter the front-point relationship. Review the revised assembled sample instead of assuming that one correction resolves every garment pairing.
Freeze the approved version precisely
Retain a labelled full-size pattern or agreed drawing, a left–right layout, the reference garment identification and photographs of the assembled sample from front, back and both sides. Add a reverse view and a close view of the fastening. Distinguish a decorative sample from the finished accessory if they have different approval status.
Record unresolved questions and name the party responsible for assembly. If the intended selling unit is a pair of embroidered pieces rather than a finished collar, state that explicitly. Confirm proposed quantity, colour references and packaging scope against that unit. An enquiry with this information can be discussed without inventing a standard collar size, closure strength or production promise.
Discuss your embroidery project
Send All4Lace the garment reference, collar outline, paired decoration plan and proposed fastening position to discuss suitable embroidery sampling. Identify which assembly decisions still need confirmation.
Contact Zhijin