Quality & Delivery
Embroidered Fabric Snagging: Review the Catch Before Approving
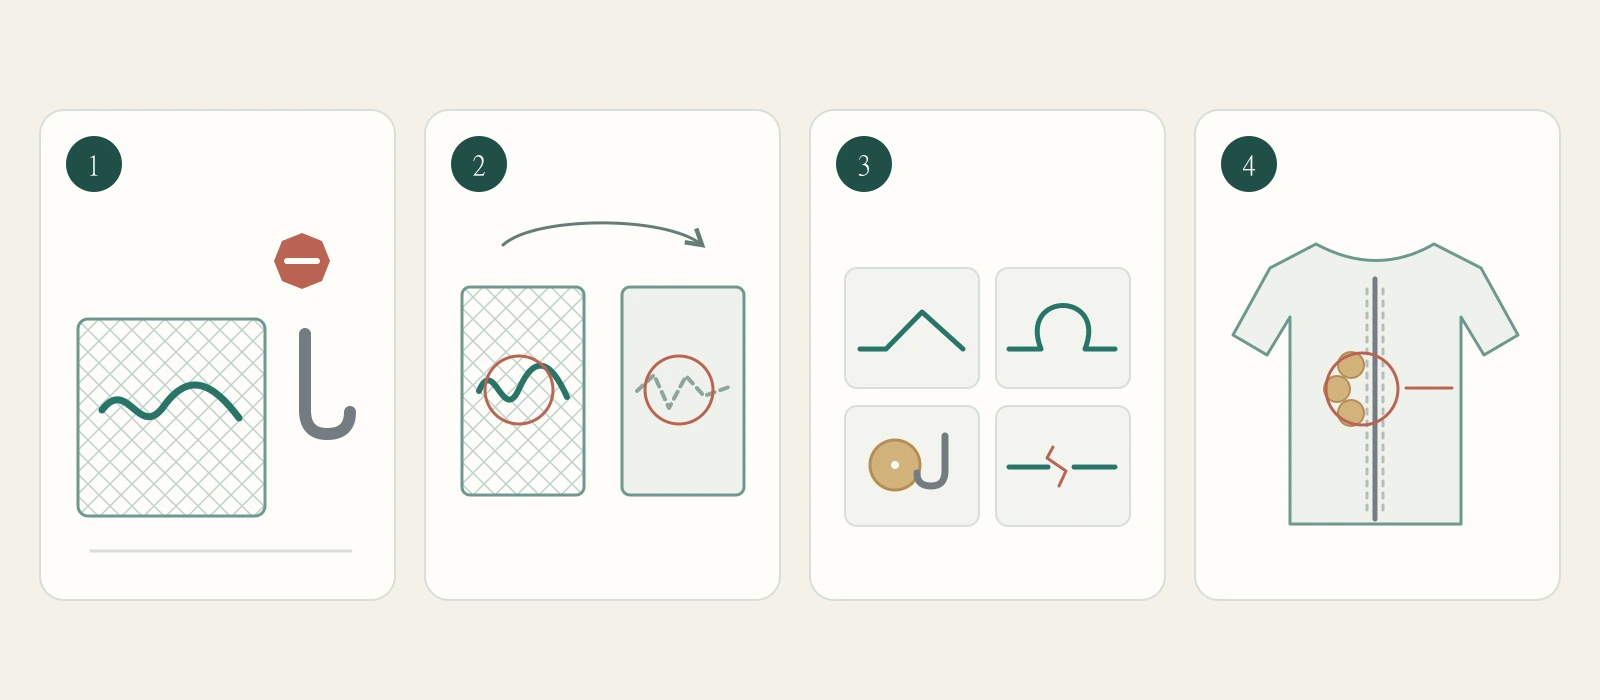
When embroidered fabric catches, stop the contact and identify what changed before deciding whether the problem belongs to the ground, embroidery, decoration or garment assembly. A pulled thread, a raised loop, a caught sequin and a broken connection need different follow-up. A photograph of the face alone cannot settle the cause or establish snagging resistance. The useful procurement decision is which sample or assembly needs further review, with the affected area preserved.
Start with the undisturbed area and its contact partner
First view a new sample supported and relaxed, before placing it beside the intended zipper, hook, jewellery or exposed edge. Note existing loops, loose ends and raised decoration before attributing later observations to contact. Use an unaffected area of the same motif as a reference; another flower may have different stitches. Intended loop embroidery is not automatically a defect.
If a catch already happened, preserve its condition. Identify the contact partner and garment location, such as a sleeve brushing a bodice ornament. If the starting condition was not observed, say so. A newly noticed protrusion shows its present appearance, not when or why it formed.
Stop movement before trying to release the catch
Stop the fitting or handling movement as soon as resistance is noticed. Support the fabric and adjacent component so their weight does not keep loading the caught point. Do not continue pulling to find a failure limit or repeat the movement to make the event more visible.
If the point remains engaged, photograph its position without forcing the parts apart and ask the garment maker how to disengage it with the area supported. Do not snip, tug back, brush flat or hide a loop before review. If release itself changes the area, distinguish the condition while caught from the condition after release. Keeping these stages separate prevents repair work from being mistaken for the original symptom.
Separate four visible conditions before assigning a cause
Use the following as descriptions of observations, not automatic diagnoses. More than one condition can occur at one point. Where thread paths disappear under dense embroidery, leave the connection uncertain rather than pulling the material to trace it.
| Visible condition | What to look for | Next review branch |
|---|---|---|
| Pulled yarn or thread | A displaced length with nearby stitches or ground drawn out of line | Compare both sides and the neighbouring motif; ask which structure has moved |
| Raised loop | A curved protrusion whose two sides appear to return to the fabric | Compare with the starting view; keep it intact until its role is understood |
| Caught bead or sequin | A decoration edge engaged with another component, with or without visible thread change | Review the contact geometry and the fixing area separately |
| Break or opening | A separated thread, interrupted connection or visible gap | Hold the affected sample and review the ground and attachment before further assembly |
Connect the face, reverse and assembly position
Take a face view that includes the complete affected motif and a closer view of the change. On the reverse, locate the corresponding point using a nearby motif edge; do not assume a loose reverse thread caused the front mark. Include a side view when a raised petal or disc hides the contact. Keep orientation consistent so another reviewer can relate the views.
Then show the surrounding assembly: the fastener edge, seam, strap or ornament that was nearby, and the direction of the movement when contact stopped. A magnified loop cannot show whether a zipper was enclosed or exposed. Conversely, a whole-garment photograph may hide a break. If the contact partner is unknown, keep that uncertainty explicit instead of naming a cause from appearance alone.
Choose the next sample step from the observed branch
If the decoration caught but no change is visible, review clearance, component orientation and the intended opening with the garment maker. A proposed change to placement or enclosure needs a representative assembled sample; an unchanged face does not prove that repeated contact is acceptable. If a pulled thread or loop is visible, hold local trimming or repair until the supplier and maker identify the affected structure and agree how any proposed correction will be checked.
If a break, opening or changed fixing connection is visible, set the affected sample aside from approved references and resolve the construction question before continuing assembly. If a similar feature existed beforehand, compare the agreed reference and determine whether it is intentional or an unresolved workmanship issue. Each branch needs an explicit decision: revise the contact arrangement, review a material concern or obtain a suitable formal evaluation. None is an automatic pass based on one encounter.
Keep contact observation separate from formal snagging evaluation
These handling observations are not an ASTM snagging test. The public scope of ASTM D3939/D3939M-26 excludes open constructions such as net, so a decorated mesh must not be assumed suitable for that method. Ask a qualified testing provider to select an appropriate method for the actual material and intended use. This guide sets no universal pulling action, acceptable number of catches or performance grade.
Discuss your embroidery project
Send All4Lace the selected fabric reference, paired face and reverse photographs, and a view of the adjacent component where contact occurred. State whether the change was present before handling and which assembly decision remains open, so the sample request addresses the actual concern.
Contact Zhijin