Materials & Applications
Embroidered Pocket Panels: Place Decoration Around Folds and Access
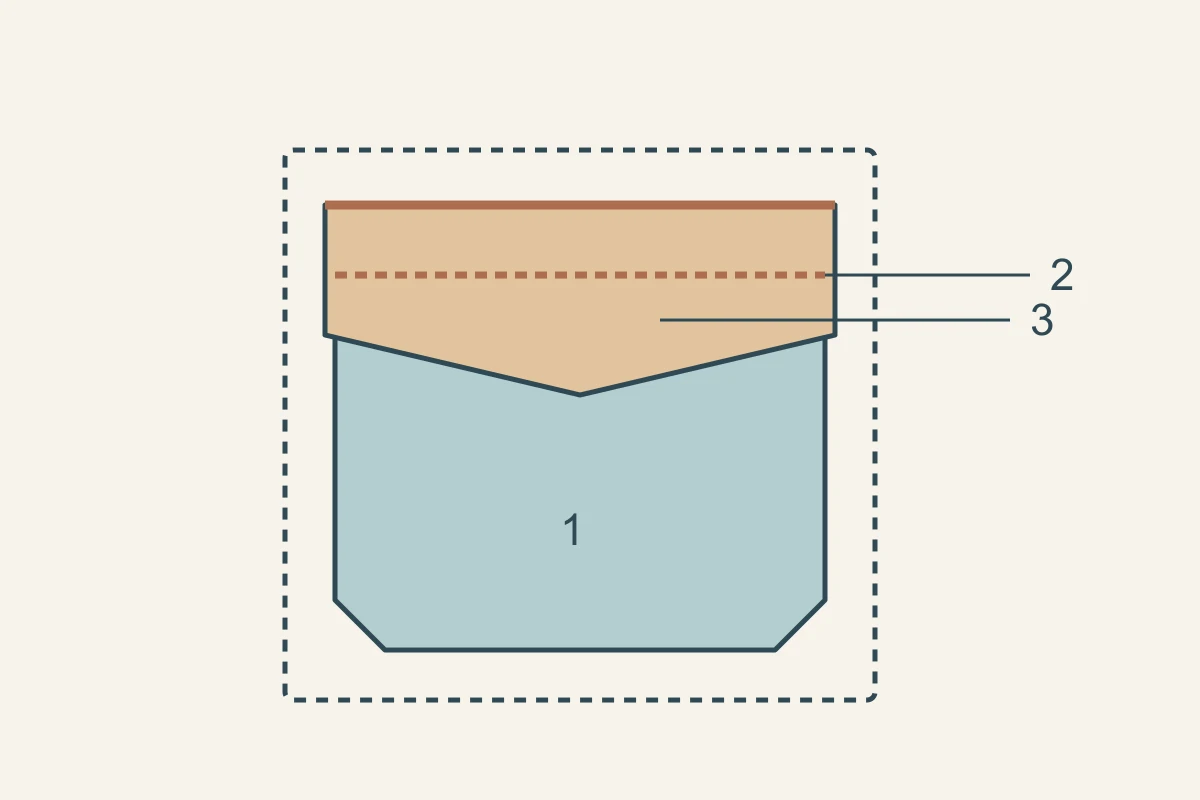
Place pocket embroidery on a drawing of the finished pocket, not just on the raw cut panel. Mark the opening, turnbacks, flap and attachment edges first. Then select which decoration should remain visible when the pocket is closed and which areas must allow the intended use. This approach applies to a decorated patch-pocket face, a separate flap or a small border beside the opening.
Decide whether it is a working pocket or decoration
Describe the intended action: a hand enters, a small object goes inside, a flap lifts, or the feature is decorative only. For a working pocket, show the usable opening and pocket interior on the drawing. For a false pocket, label it explicitly so a decorative reference does not become an unspoken promise of storage.
Separate the pocket face from a flap or trim at the mouth. They may be different pattern pieces with different visible areas. Name which piece is being sourced and whether embroidery is made on the pocket fabric itself or applied as a separate element. This keeps a quote for decorative material distinct from a complete pocket assembly.
Make a finished-shape window before positioning the motif
Trace the finished pocket outline onto a paper window and place it over the proposed embroidered panel. Add the upper fold and all edges that turn inside. Simplicity’s original patch-pocket tutorial shows the upper edge folding and a separate flap turning down over the pocket. Those changes of position are why the flat cutting shape is only the first view.
Fold a paper copy, then compare the motif before and after folding. Mark any flower, line or raised element that enters a hidden area. Use the maker’s actual pattern allowances; the point of the window is to show the visible design, not to prescribe a universal turnback width.
Technical references
Compare decoration locations and folded edges
Choose the location according to the action and the closed appearance you want. A concentrated motif on the face, decoration on a flap and an opening border produce different layouts even on the same pocket. Use the same finished outline to compare them.
| Location | Design opportunity | Question to resolve on the mock-up |
|---|---|---|
| Patch-pocket face | Show a complete motif below the opening | How much remains visible when a flap is lowered? |
| Separate flap | Make the cover itself the feature | Which surface and motif direction show when lifted? |
| Opening border | Outline the usable entry | Can the intended hand or object pass beside the decoration? |
| Fold or turned edge | Continue a line towards the boundary | What is hidden, folded or exposed after turning? |
Try the real opening on the intended garment position
Temporarily place the prepared pocket on the garment at its proposed position and review it on a fitting form or wearer. First look at it closed. Then lift the flap if present, enter the opening, remove the intended object or hand and close it again. Keep that sequence the same when comparing two layouts.
Record a specific interference location, such as the left end of the opening, rather than writing that the pocket is awkward. Review any closure with its actual button, snap or other agreed part. The maker can then revise the opening, decorated area or flap position without guessing which part of the action caused the problem.
A hypothetical skirt pocket: preserve the flower and the opening
Imagine a skirt with two mirrored patch pockets and a flap over each. In Version A, the main flower is centred on the raw pocket panel. Folding the top and lowering the flap hide its upper petals. The designer uses the finished-shape window to move the flower lower in Version B, keeping the pocket outline and flap unchanged.
The next review compares both pockets closed, then repeats the hand-entry sequence. If the flower is now visible but an opening decoration gets in the way, record a separate revision for that border instead of moving the whole motif again. This invented example separates two decisions: visible placement on the face and usable space at the mouth.
Count finished faces separately from fabric yield
Keep left and right pocket references distinct, with the fabric face, motif direction and matching rule marked. If a hypothetical sampling plan needs six skirts with two pockets each, it needs 6 × 2 = 12 finished pocket faces before any separately agreed spares. That count does not include flaps, inner pieces or extra samples unless they are listed.
Convert the count into fabric quantity only after laying the required finished shapes and allowances onto the actual usable embroidery area. A placement rule may leave regions unused. The sampling brief should therefore join the piece count to the finished window, fold map and selected fabric reference, so a small decorated pocket can be discussed as a precise supply item.
Discuss your embroidery project
Send All4Lace your finished pocket outline, fold and flap positions, and preferred embroidery reference to discuss the material for a placed pocket sample.
Contact Zhijin