Materials & Applications
Embroidered Waistband and Belt Panels: Shape, Sitting Folds and Closures
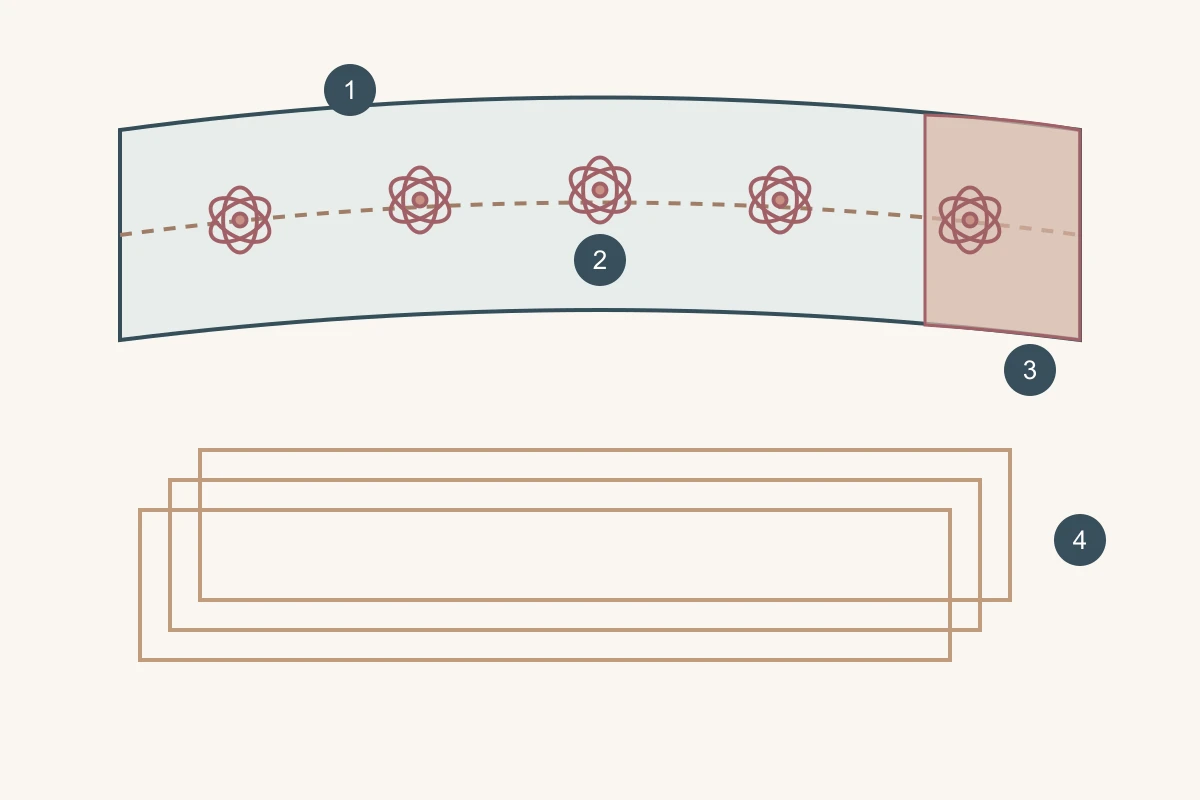
Choose embroidery for a waistband or decorative belt panel after defining the finished band and how it closes. Treat the visible embroidered face, the layers that support it and the fastening as separate parts of one design. Then review the decoration standing and seated. This guide concerns textile panels for garment development; it does not describe All4Lace as a supplier of finished belts or guarantee that embroidery provides waist support.
Separate the decorative face from the band’s job
A waistband attached to a skirt or trousers and a decorative belt worn over a dress do different jobs. Identify whether the part holds the garment at the waist, provides a visual accent or combines both. Record which layer carries the fastening and how the decorative face connects to it. This keeps the embroidery request tied to the actual assembly.
For a separate decorative belt, show how it is located on the garment and whether it moves independently. For an attached waistband, show its seam to the body. These relationships affect which edge is visible and which junctions the motif must accommodate; the same strip drawing does not describe both arrangements completely.
Work from the finished shape and visible width
Place the embroidery over the finished band pattern, including any shaping, top and bottom edges and end extensions. Mark visible width separately from cut width. A flower may fit inside the cut piece but become partly enclosed by a turned edge or hidden under the closing end.
If the band is shaped, follow its actual outline instead of replacing it with a straight rectangle. Draw the main motif in relation to the worn centre front, side and back. Decide which landmarks matter most before adjusting motif scale. Enlarging the whole pattern to fill one area can crowd another part of the shaped band.
Map where the band folds when seated
Make a representative band assembly and view it standing, sitting and after standing again. Mark the places where the sample folds or where the upper and lower edges move against the body or garment. Note whether a raised motif lies across that fold, is hidden inside it or remains visible above it.
Use those marks to discuss targeted changes: move a flower, divide a dense area into smaller groups or leave a quieter section at a repeatedly folded location. Compare the effect using the same band shape and support layers. A placement change and a construction change answer different questions, so identify which one is being revised.
Arrange the closure before placing the focal motif
Draw the closure open and closed, including overlap and any hidden fastening area. Closet Core’s waistband tutorial includes local reinforcement where a hook closure is attached; it supports considering that area separately from the decorative face. Select the actual support and fastening method with the garment team, rather than asking the lace or embroidery alone to carry the closure.
Map the visible front motif after the band is closed. The following record links decoration to the actual junctions; use the chosen closure position, whether front, side or back.
| Location | Decoration decision | View to retain |
|---|---|---|
| Visible centre | Complete focal motif after closing | Closed standing view |
| Seated fold zone | Move, split or reduce concentration | Marked seated view |
| Fastening overlap | Visible and concealed parts | Open and closed ends |
| Attachment edge | Motif near the finished seam | Inside and outside junction |
Technical references
Compare one panel revision at a time
Imagine a dress belt panel with a large central flower. The first seated sample folds across the flower’s middle. In trial A, move the complete flower above the observed fold while keeping band shape and inner layers unchanged. In trial B, retain its original centre but use two smaller motif groups on either side of the fold. Review standing and seated views for both.
If the higher flower disappears under the bodice edge while the divided arrangement stays visible, the next design choice is clear from those observations. Record the selected arrangement with the fold marks and closed-belt view. The scenario is hypothetical and supplies no measured comfort or durability result.
Specify the textile panel as its own component
For the textile request, identify whether the decorative component is a cut panel, a repeat-based length or an embroidery arrangement to be developed. Supply the visible band outline, motif landmarks and areas occupied by the fastening. Keep any garment support layer and hardware listed as separate components.
A size change may alter the band outline, overlap and visible decoration together. Preserve the chosen motif relationship on each relevant pattern rather than assuming that increasing length at one end leaves the design unchanged. This makes the component specification useful beyond the first presentation size.
Discuss your embroidery project
Send All4Lace the finished waistband or decorative belt-panel outline, closure overlap, motif priorities and marked sitting-fold areas. State the textile component required and include your garment team’s proposed support layers as a separate reference.
Contact Zhijin