Customization & Sampling
How to Join Lace Trim Ends: Match the Motif Before Cutting
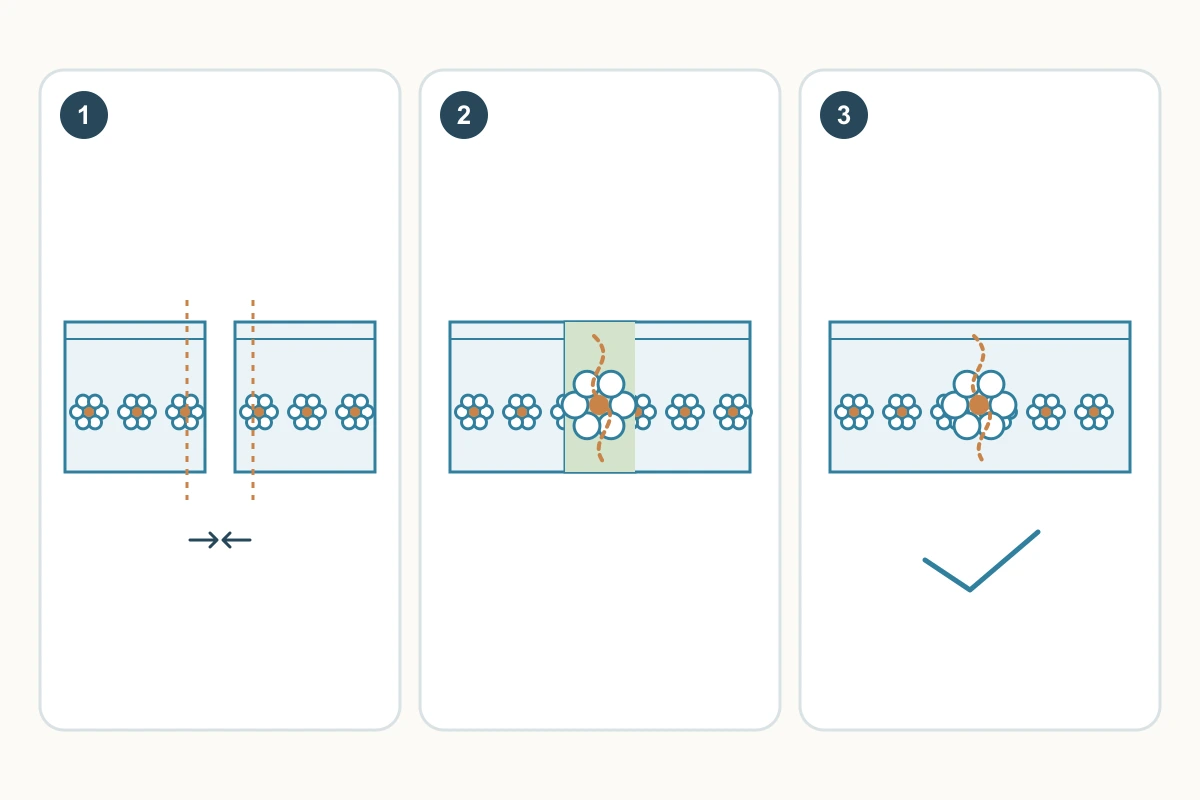
An end join must do two jobs: close the strip at its intended length and keep the motif readable. Solving the flower match while ignoring the seam take-up can leave a loop too short. Begin with a labelled pair of offcuts. The two approaches below offer different ways to control bulk and cut edges; neither guarantees an invisible join on every lace.
1. Mark the finished ends
Set out the strip in the direction it will be used. Mark its face, upper edge and the two intended join positions. For a closed loop, measure at the attachment line in its relaxed condition. Keep any fastening overlap separate from an end seam so the same allowance is not counted twice.
Reserve enough spare material to try the join before committing the full strip. On the trial, copy the actual heading, decorative edge and any backing that will remain. If beads or rigid decoration occupy the planned stitching path, resolve that construction before attempting to fold or sew over them.
2. Find corresponding motif landmarks
Use a distinct flower centre, leaf junction or scallop valley to compare the two ends. Bring corresponding landmarks together with both pieces facing the same direction. Look across the full width: matching the upper border can still leave the lower scallops out of phase.
In an assumed example with a 6 cm repeat, 42 cm spans seven repeats, while 43 cm spans seven repeats plus 1 cm. That arithmetic helps locate a likely mismatch but does not tell you how much to cut. Seam take-up and overlap must be mapped separately; do not silently shorten a required 43 cm loop to force a match.
Technical references
3. Choose a join that suits the cut edge
Compare the trial methods on the same background and with the same intended finished length. A seam can be the more practical choice when a cut structure unravels; an overlap can preserve an outlined motif where the structure supports it. Choose the stitch route before removing the spare material.
| Approach | Why trial it | Main point to inspect |
|---|---|---|
| Conventional seam with finished allowances | Contains a cut edge that needs protection | Ridge, visible allowance and loss of length |
| Aligned motif overlap | May reduce a straight break in the pattern | Double thickness, secure connections and trimming limits |
4. Trial a conventional seam
Put the ends right sides together and align the marked join lines, not merely the raw cut edges. Baste and stitch along that line using a seam tested for the lace. Open the strip to check its length and edge alignment before deciding how to finish the allowances.
Contain fraying cut ends with a suitable enclosed or overcast treatment that the trial can carry. Compare the resulting ridge from the face and reverse; turning every end under may create too much thickness in a small heading. Keep the joined trial flat and verify it again after the inside finish has been completed.
Technical references
5. Trial an overlap around a motif
For suitable lace, overlap the ends face up until corresponding motifs agree and baste the layers. Plan small hand stitches through connected parts around the selected motif, catching both layers without pulling the open ground together. A visually quieter route may curve with a flower rather than cross it in a straight line.
Secure and inspect the connection before cautiously reducing spare lace on one layer at a time. Keep scissors away from the supporting layer and the new stitches. Stop if trimming opens an essential connecting bridge or starts fraying that the join cannot contain. This is a selective method, not permission to cut every lace close to its embroidery.
Technical references
6. Inspect the complete loop, not only the join
Let the joined trial relax. For a loop, compare its attachment length with the requirement; for a straight strip, check that the heading remains straight. Look for a doubled flower, a blank interruption, a step in the decorative edge and a dark patch created by overlapping layers.
Put the trial over the actual background fabric and view both sides. Gently handle it in the way the intended part will be used, checking that the join stays aligned without treating this as a strength test. Photograph the approved face and inside, mark the finished length and retain the offcut with its stitch and allowance notes.
Discuss your embroidery project
For an All4Lace trim enquiry, send the required finished length and photos of the motif, both ends and your chosen join trial, with its attachment line marked.
Contact Zhijin