Customization & Sampling
How to Sew Lace Trim to Fabric: Choose the Stitch, Keep the Edge Flat
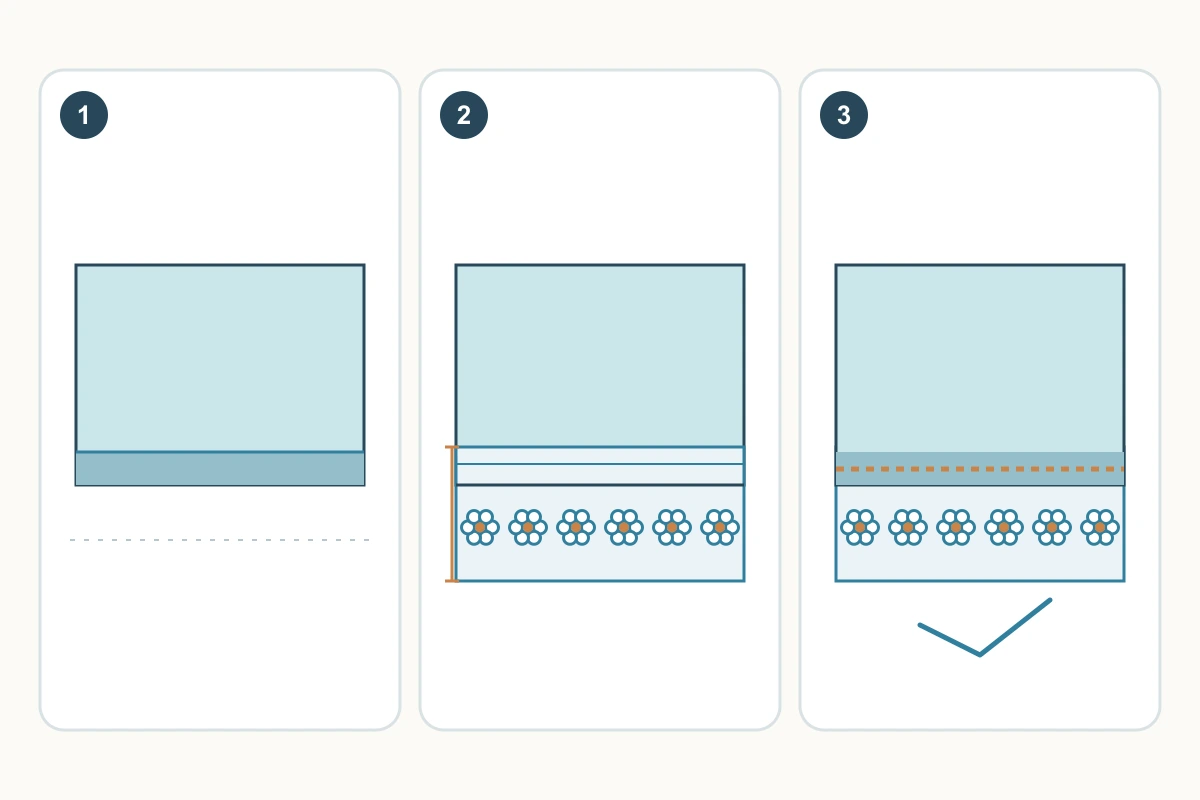
To sew flat lace trim to fabric, finish the fabric edge, overlap it with a continuous lace attachment heading, baste the two layers without stretching them, then stitch through both on a short trial. Choose the needle and stitch from the actual construction and required movement. A narrow zigzag is one useful option, but it cannot rescue a seam that misses the lace structure. This guide covers applied edging; it does not instruct you to cut the fabric away for an insertion.
1. Find a sewable heading before choosing a stitch
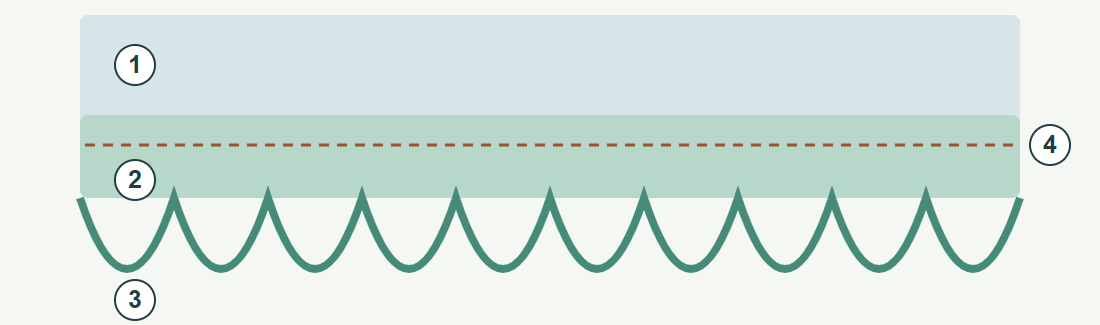
The heading is the band along which the trim can be attached. A continuous firm band offers a different sewing path from loose mesh, isolated motifs or a scallop. Look through the proposed needle path: will it repeatedly catch connected material? If it crosses mostly holes, move the line to a usable band or change the construction rather than making the stitches denser.
Decide whether the whole finished edge must remain stable or stretch during wear. Stretch lace attached to an intentionally stable woven hem does not automatically require a stretch seam; a sleeve opening that must expand does. Lace with no secure heading may need a separate support band or motif-by-motif attachment. Those are different assemblies to sample, not substitutes made by stitching across empty net.
2. Pick a first trial by structure and movement
Match the needle system to the machine first. Then choose a needle type for the material at the seam, and a size compatible with the thread and stack. SCHMETZ distinguishes general-purpose, ball-point knit and stretch needles; this makes a better starting decision than choosing solely because the fibre is polyester. Try the selected needle on the exact hem, heading and backing together. Reject holes that remain enlarged, cut yarns, skipped stitches or shredded thread; do not keep sewing to conceal them.
For a stable heading on a stable finished edge, trial a straight stitch that consistently catches both layers. Trial a narrow zigzag when the path needs to bridge a small edge or the assembly requires movement; set its width so its landings catch the intended material, not merely open holes. With elastic knit lace, a compatible stretch or ball-point needle is a candidate, not a guarantee. Check the seam in the actual required direction after relaxation. Machine and fabric guidance, followed by the trial, determine the settings.
| Assembly | First trial to compare | Reject or revise when |
|---|---|---|
| Stable heading + stable hem | Straight attachment; compare zigzag if the edge is hard to catch | Needle misses the heading or layers creep |
| Assembly must extend | Compatible elastic stitch with appropriate needle; compare required movement | Thread pops, seam restricts movement, or heading distorts |
| Loose net or disconnected motifs | A supported attachment construction before a full-length seam | Stitches pull through openings or leave damaged yarns |
Technical references
3. Set the visible width and keep reference marks aligned
Finish the garment hem first, because its fold changes the thickness and the amount of lace hidden behind it. Position the lace face up, mark the finished fabric edge and mark the overlap on the heading. Hypothetical example: a 30 mm trim with 8 mm hidden behind the fabric shows 22 mm beyond the edge. These are layout dimensions, not a recommended overlap; specify whether a scallop is measured to its peak or valley.
Mark corresponding points at the beginning, middle and end of both layers. Hand-baste through supported material so the marks stay together. Keep the garment weight on the table and guide it without pulling. If it slides between marks, shorten the unsupported interval or improve the temporary hold before altering tension. Test any removable support and its removal on spare material; an adhesive or wash-away support changes the trial and may be unsuitable for the care plan.
4. Sew a short section and inspect it relaxed
Include the starting end, several motifs and an ending section in the trial. Keep the heading under the chosen line, remove pins before the needle reaches them, and stop if the machine knocks or the needle catches an embellishment. Do not sew through beads or sequins just to preserve the drawn path. Reposition the path or have the decorated seam area prepared and secured as a separate construction.
Take the sample out and lay it down without stretching it flat. Compare the reference marks, visible width, reverse side and an unsewn strip. A seam is not approved merely because it looks flat under the presser foot. For an extensible opening, assess the agreed movement as well as the relaxed appearance; for a stable edge, check that it has not been lengthened during handling.
5. Diagnose the symptom before turning a dial
Puckering can have several interacting causes, including thread tension, material displacement and unequal feeding. Use spare trials for investigation and change one condition at a time. The observations below identify what to inspect next; they do not prove a single cause from appearance alone. Persistent damage or uncertain machine behaviour is a reason to change the trial or seek a machine technician, rather than continue on the garment.
| Observed symptom | Check first | Next controlled trial |
|---|---|---|
| End marks no longer meet; one layer finishes longer | Whether either layer was pulled or unsupported | Re-baste, support the weight and sew without stretching; if needed compare a machine-compatible feeding aid |
| Layers align but stitch line draws into small wrinkles | Threading, stitch balance and damage; compare relaxed unsewn material | Re-thread and follow the machine tension guidance on a new trial; alter only the chosen setting and recheck both faces |
| Heading slips away or stitches hold only isolated strands | Exact needle landings and width of usable heading | Move the path onto connected material or trial a support construction; do not add density over holes |
| Skipped stitches or cut yarns | Needle condition, installation, system, type and thread compatibility | Replace a damaged needle, then compare an appropriate type on the same stack; stop if damage persists |
| Flat when sewn, puckered after care | Whether trim, fabric and thread changed differently | Repeat the planned care on the complete trial; revise component or construction choices |
Technical references
6. Finish a cut end or a join before approving the full run
Plan the whole cut-end finish before attaching the trim. Three jobs are distinct: the lengthwise attachment joins the heading to the garment; permanent end-securing stitches hold the parts of the exposed folded end that need restraint; temporary basting only keeps the layout in place until the permanent work is complete. A lengthwise seam through the heading does not automatically finish the decorative part of a cut end.
Only consider this double-turn example for a soft, thin trim whose structure offers a reliable permanent stitch path for every part of the exposed cut edge that needs enclosing and securing. A continuous upper heading alone is insufficient. Hypothetical counterexample: a 30 mm trim with only a 4 mm upper heading that can carry stitches. Securing the folds only through that 4 mm does not establish that the lower decorative end is held. If the rest has no reliable permanent path, reject this method for that trim; temporary basting cannot be its lasting closure.
Where a garment maker has established that a complete end-securing path is feasible, trial the fold before attachment. First turn a small depth of the cut end to the reverse. The raw edge is still exposed after this first turn. Turn the folded end toward the reverse again, slightly deeper than the first turn, placing the raw edge inside the second fold rather than exactly on its bend. Check its physical position and containment; through transparent lace openings an enclosed edge may remain visible. Seeing it through a hole is not itself proof that it is outside the fold. Mark both turns before calculating and cutting the full run.
Baste the folded end for positioning, then have all portions requiring restraint permanently secured along the suitable end path established for that structure, before relying on the lengthwise attachment seam. This article does not specify a full-end needle path for loose mesh or isolated motifs. A double turn can form three lace layers locally before garment and support layers are counted. If there is no reliable full-end path, the stack is too bulky, or the motif is spoiled, reject the trial. Have the garment maker design and verify a seam or end finish that contains and secures the entire cut end; merely enclosing its upper heading is not enough.
If a later garment seam is intended to enclose the end, its assembly trial must demonstrate containment and securing of the complete cut edge, including the lower decorative portion that needs restraint. Leave the required construction allowance outside the visible run. For an end-to-end join, match the motif and ask the garment maker to establish an appropriate supported joint for the actual structure, then test the complete junction on both faces. A clean cut or an attractive folded shape alone is not a finished end.
After the permanent lengthwise attachment and the complete end-securing work are finished, remove only the basting and temporary support designated for removal, using the method tested on spare material. Retain support intended as part of the finished stack. Let the edge relax and inspect both faces, the entire exposed end and every folded portion: the permanent securing must still hold all parts that need restraint without help from removed threads or support. Reject loose or unfolding portions; recheck physical cut-edge containment, holes, residue, pulled yarns, damaged stitches, reference marks and visible width. Transparency alone is not a containment test.
Keep the approved trial with its trim reference, fabric and backing, overlap marks, needle, thread, stitch settings, complete end treatment and care result. This proposed double-turn example has not been physically tested here. Only an actual assembly with agreed checks can establish its suitability; similar-looking lace or a passed text review does not provide that proof.
Discuss your embroidery project
For an All4Lace edging enquiry, send the trim reference, fabric and lining, required edge movement, visible-width sketch and photographs of the trial front, reverse and end junction. This lets the sample discussion focus on a workable heading and finish.
Contact Zhijin