Materials & Applications
Lace Dress Back Panels: Plan the Opening and the Whole Back
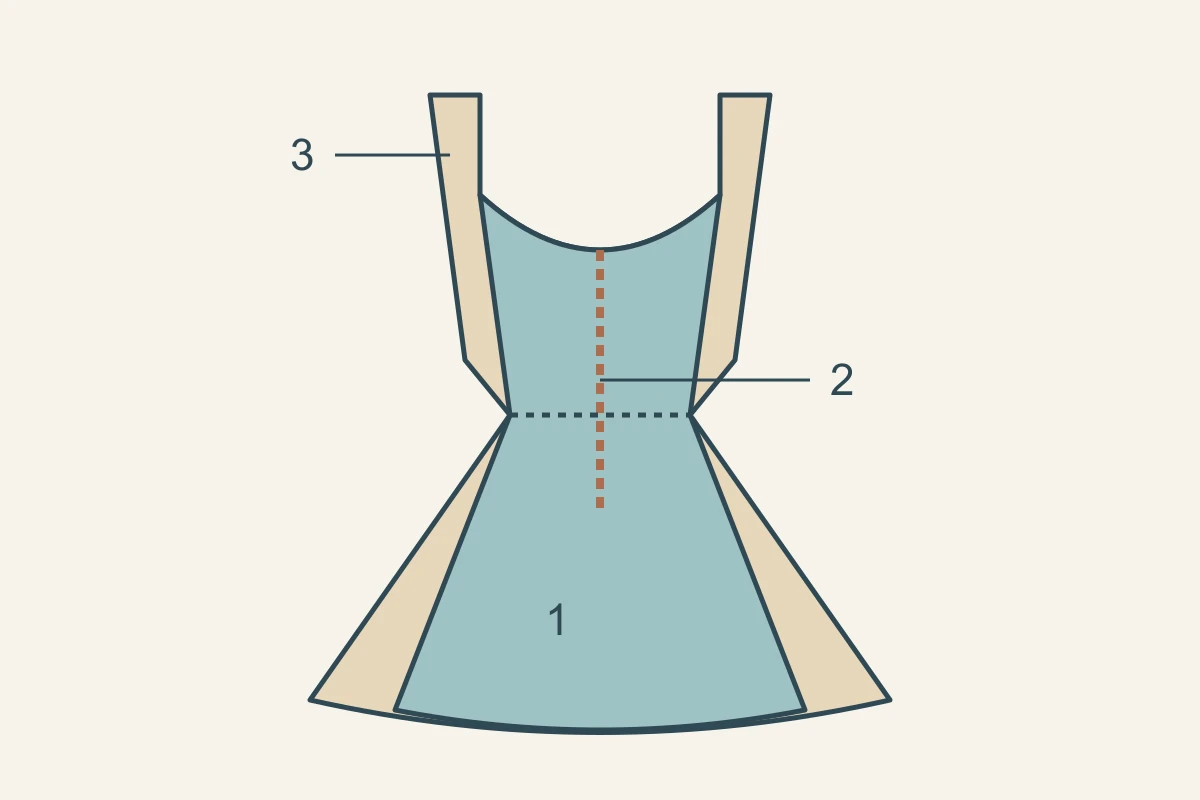
A lace dress back works best when the opening route and the whole back shape are designed together. Map the lace from its upper joins to its lower boundary, then place the zip, buttons or other closure on that drawing. This is a complete back-panel decision, including any waist shaping and continuation below the waist, rather than a small upper-back insert.
Draw a continuous map from upper join to lower boundary
Start with the back pattern and mark shoulder or strap joins, neckline, waist and the lower end of the lace. Include darts, shaped seams and any join to the skirt. If the panel passes across the waist, show that transition on both the flat drawing and the garment view so the lace layout is not approved for only half its job.
Use separate lines for the finished outline, cutting edge and decoration boundary. Name the intended inner layer beside each region: full lining, a shaped inner panel or an intentionally exposed area. These notes give the maker a readable map of the entire back instead of leaving the area below the neckline unresolved.
Choose the route for getting into the dress
Place the opening before centring the main motif. A centre-back zip divides the back layout; a side opening leaves a different area available for the back design. A small upper opening also needs its own closure and an agreed entry arrangement for the rest of the dress. Compare the actual proposals rather than choosing a closure name in isolation.
The Etta lining tutorial from Tilly and the Buttons shows lining and facing meeting zip tapes at a back opening. Its useful lesson for a sourcing brief is to draw the adjacent layers at the opening. The pattern maker then develops the construction for this dress.
| Proposed route | Layout question | Useful review view |
|---|---|---|
| Centre-back opening | Where does the split cross the main motif? | Back closed, then opened with both edges visible |
| Side opening | What uninterrupted area is available on the back? | Back placement plus a separate side-opening view |
| Upper back opening | How does it connect with the dress entry arrangement? | Upper closure and the complete opening sequence |
Technical references
Mark the upper joins and visible inner edges
Show the width and position of the intended straps or shoulder joins on the actual pattern. Place the lace beside the chosen strap material and edge finish, then view the inside and outside of that junction. Keep the maker responsible for the dress’s fit and support design while the fabric selection addresses the visible lace arrangement.
Use the intended undergarment or an agreed fitting equivalent when reviewing a sheer back. Mark its position in the fitting notes and photograph the planned inner-layer boundary. An uncovered strip, exposed fastening or visible inner edge can then be treated as a specific design choice with a precise location.
Follow the motif through waist shaping
Lay the lace over the finished pattern shape and trace a chosen motif from the upper back towards the waist and lower panel. Examine what a dart or shaped seam removes. If a flower sits across that area, decide whether its assembled appearance is intentional before duplicating the layout for another size.
Compare the back while the dress is fastened. Where left and right pieces meet, select a clear priority: a continuous line, paired motifs or a deliberate break. Record a near view of the waist transition and a full-back view; the close-up explains the join, while the wider view shows whether the panel reads as one design.
Use a repeatable entry and fitting sequence
Begin with the dress open and record the intended sequence for putting it on and closing it. Check access to the chosen fastening, then photograph the back fully closed. Next review sitting, standing and raising the arms within the intended use. Note the position of the opening, straps and inner edges after each movement.
Use the same sequence for the next version. Keep a short record with the action, observed location and chosen revision, rather than a general comment that the back feels wrong. This makes it easier to distinguish an entry problem, a fitting adjustment and a motif-placement change.
A hypothetical dress: compare two opening layouts
Imagine a dress with one large branching motif continuing down the back beyond the waist. Version A places a centre-back zip through the stem. The designer prefers the stem uninterrupted, so Version B moves the opening to the side in a revised pattern. The team keeps the lace reference and main motif position fixed to compare the opening decision.
Review B with the complete entry sequence, side closure view and full-back photograph. If the upper edge shifts during dressing, record that separately for the maker; if the stem now appears continuous, record the visual improvement independently. This invented example shows a traceable choice, not a completed customer order. The retained brief names the pattern version, layer references and agreed fabric supply form.
Discuss your embroidery project
Send All4Lace your complete back-panel pattern, opening map and preferred lace reference to discuss a sample that covers the actual back layout.
Contact Zhijin