Materials & Applications
Insertion Lace vs Edging: Choose by the Two Attachment Sides
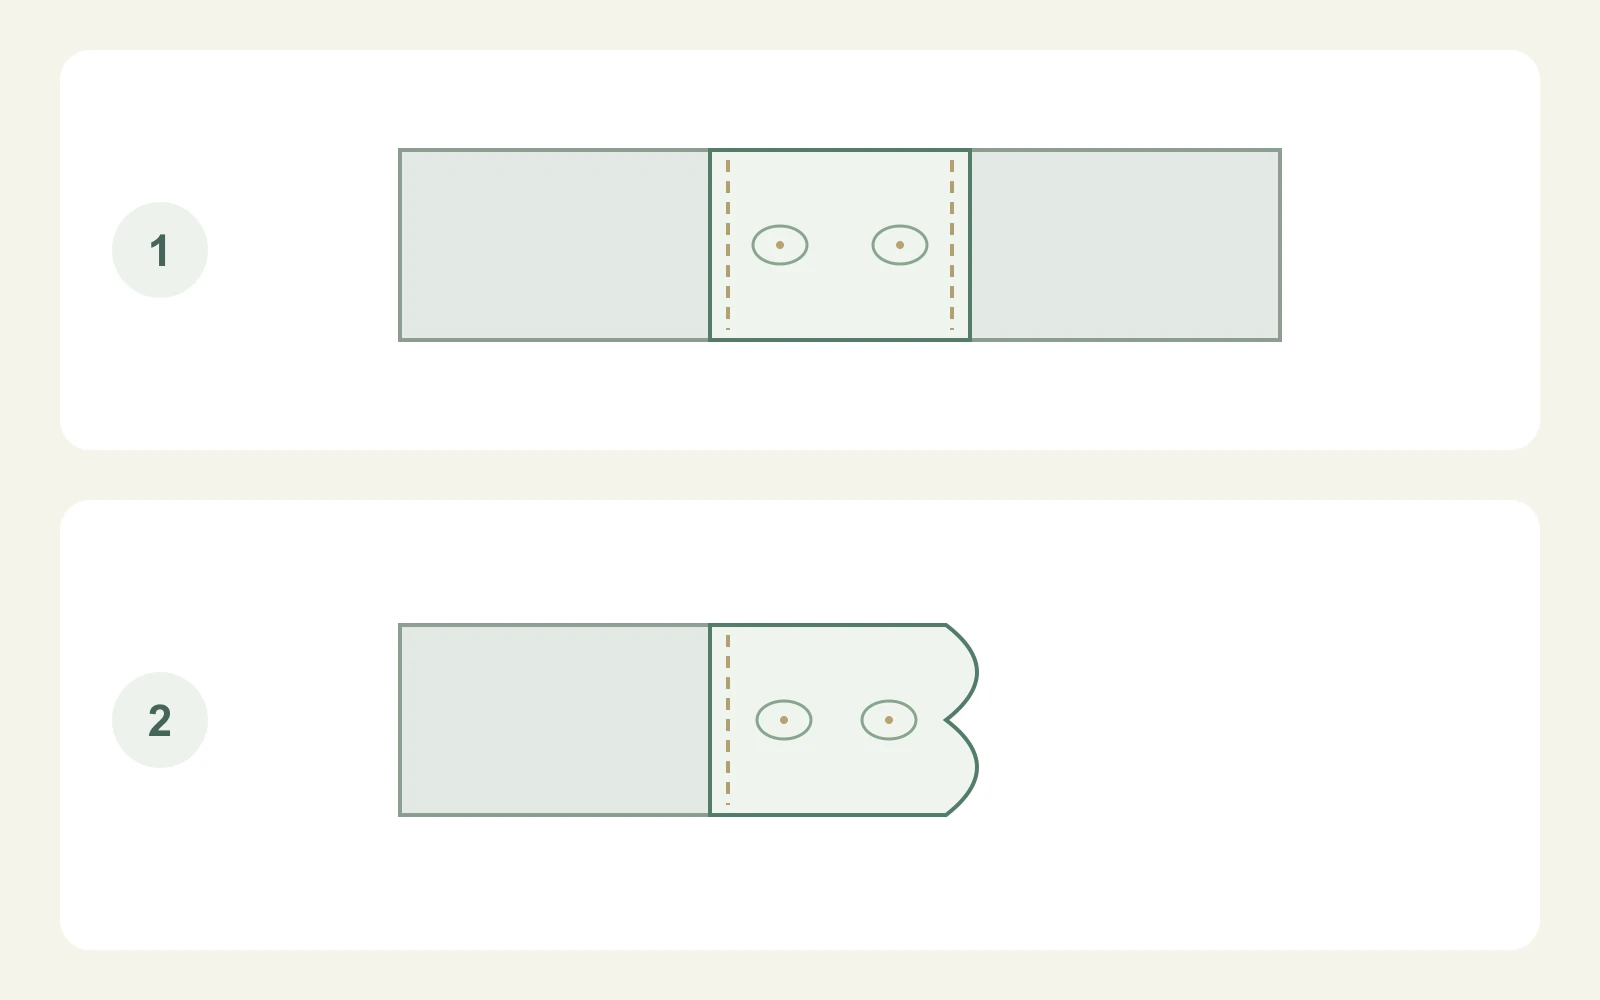
Insertion lace is used as a band connected along both long sides within a garment or textile assembly. Edging is used along an exposed outer boundary, with one side providing the attachment and the other forming the decorative edge. Choose by the intended connection, then inspect the offered trim. Two decorative borders alone do not make a strip suitable for insertion, and a product name does not show how the garment layers will meet.
Start with the joining role, not the border count
Folkwear’s own lace-insertion tutorial describes insertion with two mostly straight sides and edging with an attachment side and a shaped decorative side. This is a useful starting point for reading a sample. Look at whether the two proposed joining areas are actually present and compatible with the intended placement.
Keep decorative shape and connection function separate. A strip with two scalloped sides may be an attractive surface decoration while still requiring a different attachment arrangement. Conversely, a plain-looking long edge can be the important joining area even when it will disappear under the garment fabric.
Technical references
Draw both fabric connections before selecting the trim
On a sketch, show the fabric area on each side of an inserted band and mark the finished junctions. For edging, show the garment boundary, attachment side and free decorative side. Identify whether fabric or a lining remains behind the lace. That decision controls the visible result and should be recorded before comparing similar-looking trims.
Compare insertion, edging and a surface band
A narrow lace band photographed on a white table can resemble all three arrangements below. Compare the assembly drawing with the sample rather than treating the photograph as a connection plan.
| Arrangement | Where it connects | What the brief must show |
|---|---|---|
| Insertion | Along two long sides between fabric areas | Both junctions and the visible centre band |
| Edging | Along one side at an exposed boundary | Attachment side and free decorative border |
| Surface band | On the face of an existing fabric area | What stays behind and which edges are secured |
| Two shaped borders | An edge appearance, not a joining plan | The proposed assembly and attachment zones |
Example: a blouse panel and its sleeve edge
Imagine a blouse front with a horizontal lace band between an upper panel and a lower panel. The brief should identify both junctions and the visible lace between them. Place the chosen garment fabrics beside the band on a sample board and mark which parts will be covered in the final assembly.
Now imagine using a related trim at the sleeve opening. The decorative side extends beyond the sleeve edge while the attachment side is incorporated into the cuff assembly. The motif may coordinate with the front band, but its role is different. Review the front insertion and sleeve edging separately, then check them together for a coordinated appearance.
Check the reverse of the proposed assembly
Inspect the reverse of the small assembled sample as well as the front. Note any fabric still behind the openwork, the way the two joining areas are covered and the appearance at an end or crossing seam. If a lining is planned, include it in the review. Ask the garment team to decide the actual seam construction; a decorative band width alone cannot specify that construction.
Approve the visible band and its surroundings
Record total supplied width, the intended visible band and the two joining zones as distinct fields for insertion. For edging, record the attachment zone and the exposed projection. Include a photograph or drawing of the accepted front and reverse. A later substitute should be assessed against those same connections, even if its flowers and colour look similar.
- Identify insertion or outer-edge use on the garment drawing.
- Mark all attachment zones and the intended visible lace.
- Confirm what remains behind the band.
- Approve front, reverse and an end or crossing seam.
Discuss your embroidery project
Send All4Lace the garment layout and a lace reference, marking both connections for insertion or the exposed side for edging, so we can discuss the appropriate sample requirements.
Contact Zhijin