Materials & Applications
Sequin Fabric Seam Allowances: Plan the Join Before Cutting
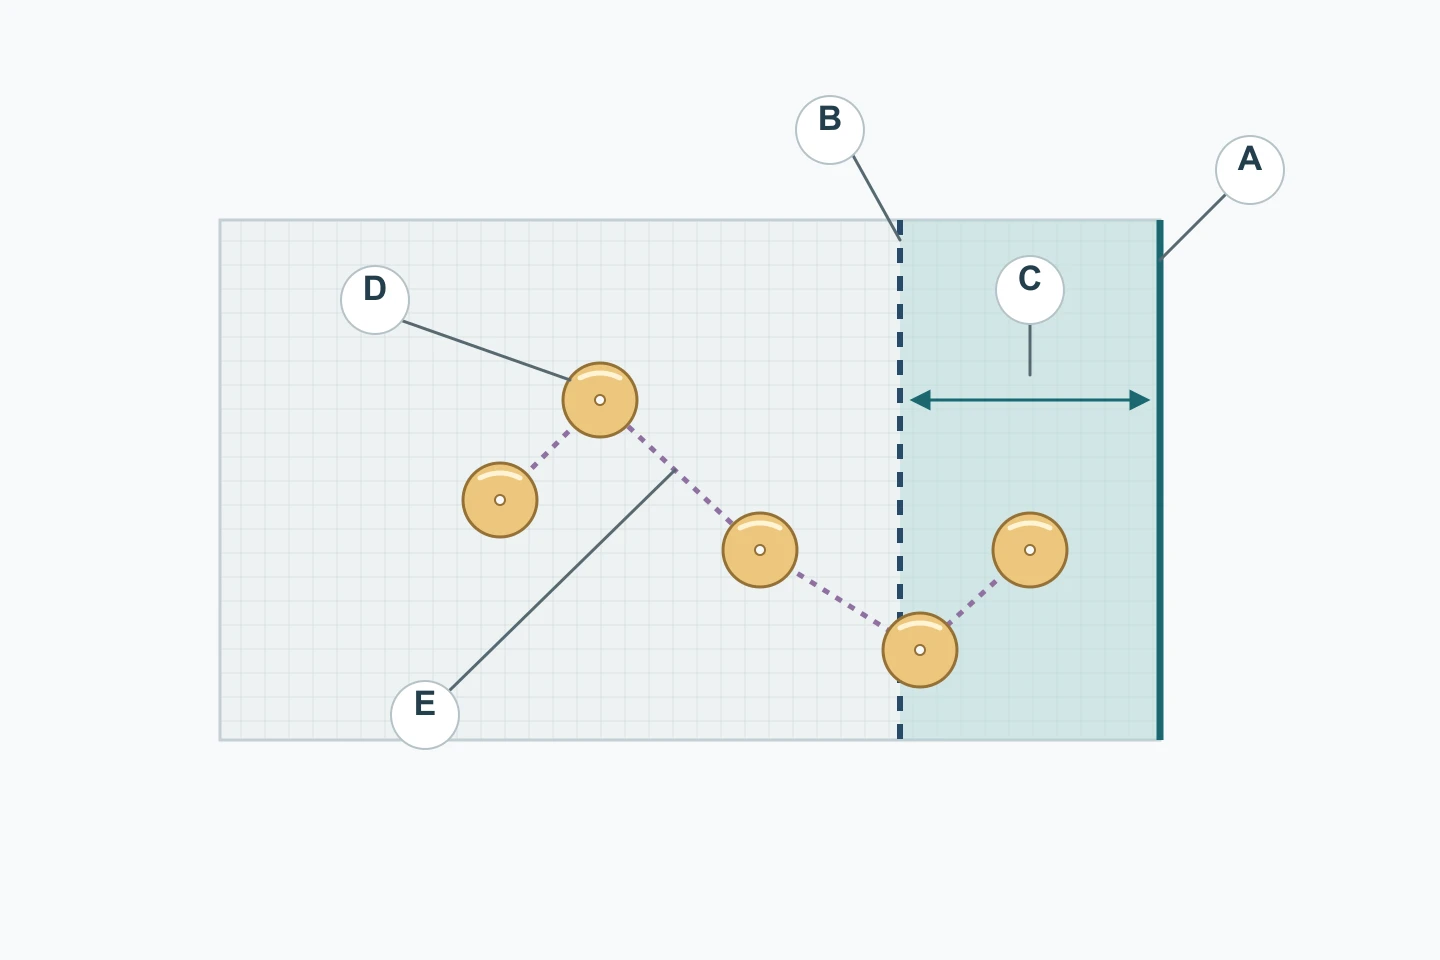
A seam allowance for sequin fabric should be planned with the actual ground, decoration, attachment and garment seam. There is no single width or removal rule that resolves every combination. Mark the cutting line and stitch line first, then review how the sequins and their fixing threads relate to both. Test that proposed join before cutting the garment panels.
Separate the allowance from decoration clearance
The seam allowance is the fabric between the cutting line and the stitch line. It is measured from the fabric’s planned cut edge to that line, not from the outer rim of a nearby sequin. A disc can extend across a line while its fixing point sits elsewhere, so its edge is a separate observation.
On the pattern, show both lines and confirm whether the allowance is already included. On the material reference, mark any area the garment maker proposes to keep clear of decoration. The fabric allowance and the proposed decoration clearance may have different boundaries; name each one instead of labelling both seam allowance.
Technical references
Inspect the fixing route before changing a sequin
Wilcom’s documentation distinguishes sequin placement from fixing stitches and allows different fixing arrangements. For a seam trial, examine the face and reverse of the actual material to trace what holds the pieces near the join. Record whether the proposed cutting or sewing route meets a disc, its fixing stitches or another attached element.
If local removal is proposed, first work on an identified offcut and check what happens to the neighbouring decoration. Do not assume that cutting one visible thread affects only one sequin. Ask the garment maker to establish any necessary securing method, then inspect the retained pieces after the trial rather than treating a cleared strip as finished.
Technical references
Choose removal or retention from a real seam trial
BERNINA’s WeAllSew tutorial presents removal for a larger-sequin example and also describes a finer-sequin garment made without removal. The useful lesson is to compare the actual construction. Sequin size alone does not describe the ground, fixing route, extra beads or cord, or how the chosen seam will enclose the allowance.
Make the proposed seam on a representative offcut with its planned layers. If the garment maker proposes a second treatment, label and compare both versions. Inspect the face, reverse, seam profile and adjacent attachments. Decide whether each version gives the intended appearance and assembly, and record what still needs changing before selecting the allowance and treatment.
Technical references
Use different joins as different sample questions
For a straight skirt side seam, mark a matching decoration feature on the two panels and inspect its alignment after joining. For a curved neckline with a facing, trial the actual curve and turn, including the edge facing the wearer. These are different sample questions even if both panels use the same sequin fabric.
At a zipper opening, mark the opening and seam lines and include the selected zipper assembly in the trial. Check its opening and closing alongside the decoration. Do not move the stitch line merely to miss one sequin without reviewing the garment pattern. Resolve the treatment with the garment maker while keeping the intended fit and join position explicit.
| Garment join | Include in the trial | Decision to record |
|---|---|---|
| Straight skirt side seam | Both panel edges and the intended motif alignment | Allowance, decoration treatment and finished alignment |
| Curved faced neckline | Actual curve, facing and turned edge | Treatment through the turn and wearer-facing edge |
| Zipper opening | Selected zipper, opening marks and decoration nearby | Join location and operation after assembly |
Keep the seam decision tied to its sample
Record the pattern version, cut and stitch lines, selected allowance, material reference, face and reverse photographs, layer arrangement and decoration treatment. If any pieces are removed, record the local securing and restoration work actually checked. Keep the trial attached to this record so another operator can distinguish an approved route from an untested suggestion.
Any finishing or pressing step belongs to that specific combination and needs its own agreed trial; a universal heat-press rule does not follow from the word sequin. When the ground, decoration, fixing route or seam construction changes, revisit the affected join. Carry forward the recorded sample decision only after confirming that it still applies.
Discuss your embroidery project
Send All4Lace the catalogue reference, marked seam location and proposed garment construction. Include a reverse close-up and the seam trial needed so we can clarify the material sample request before you finalise the cutting plan.
Contact Zhijin