Materials & Applications
3D Floral Embroidery: Petals, Attachment and Garment Placement
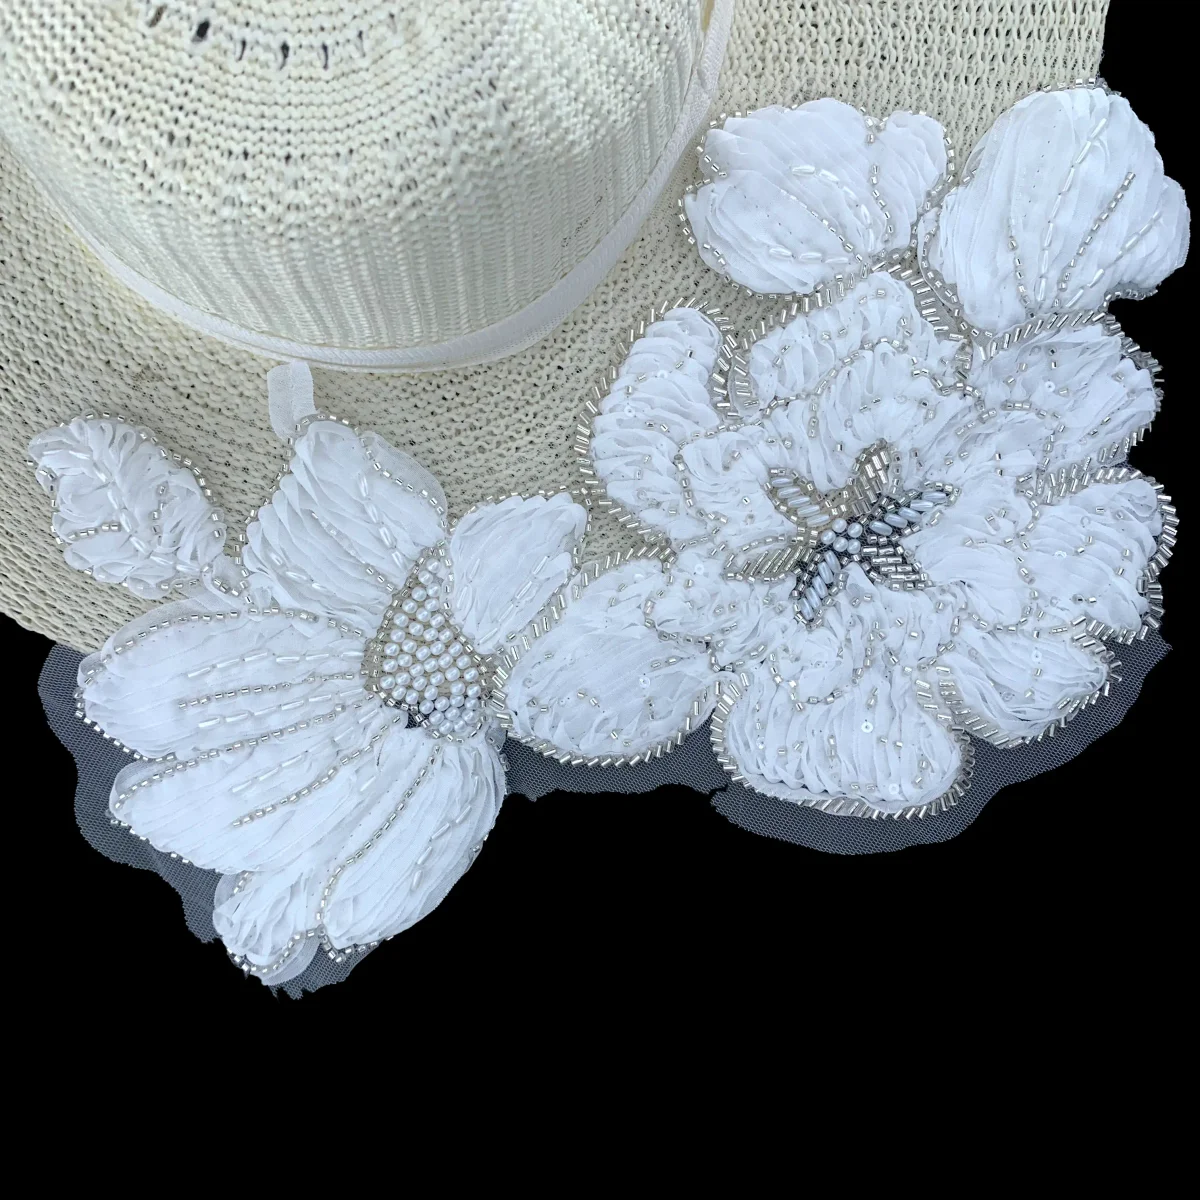
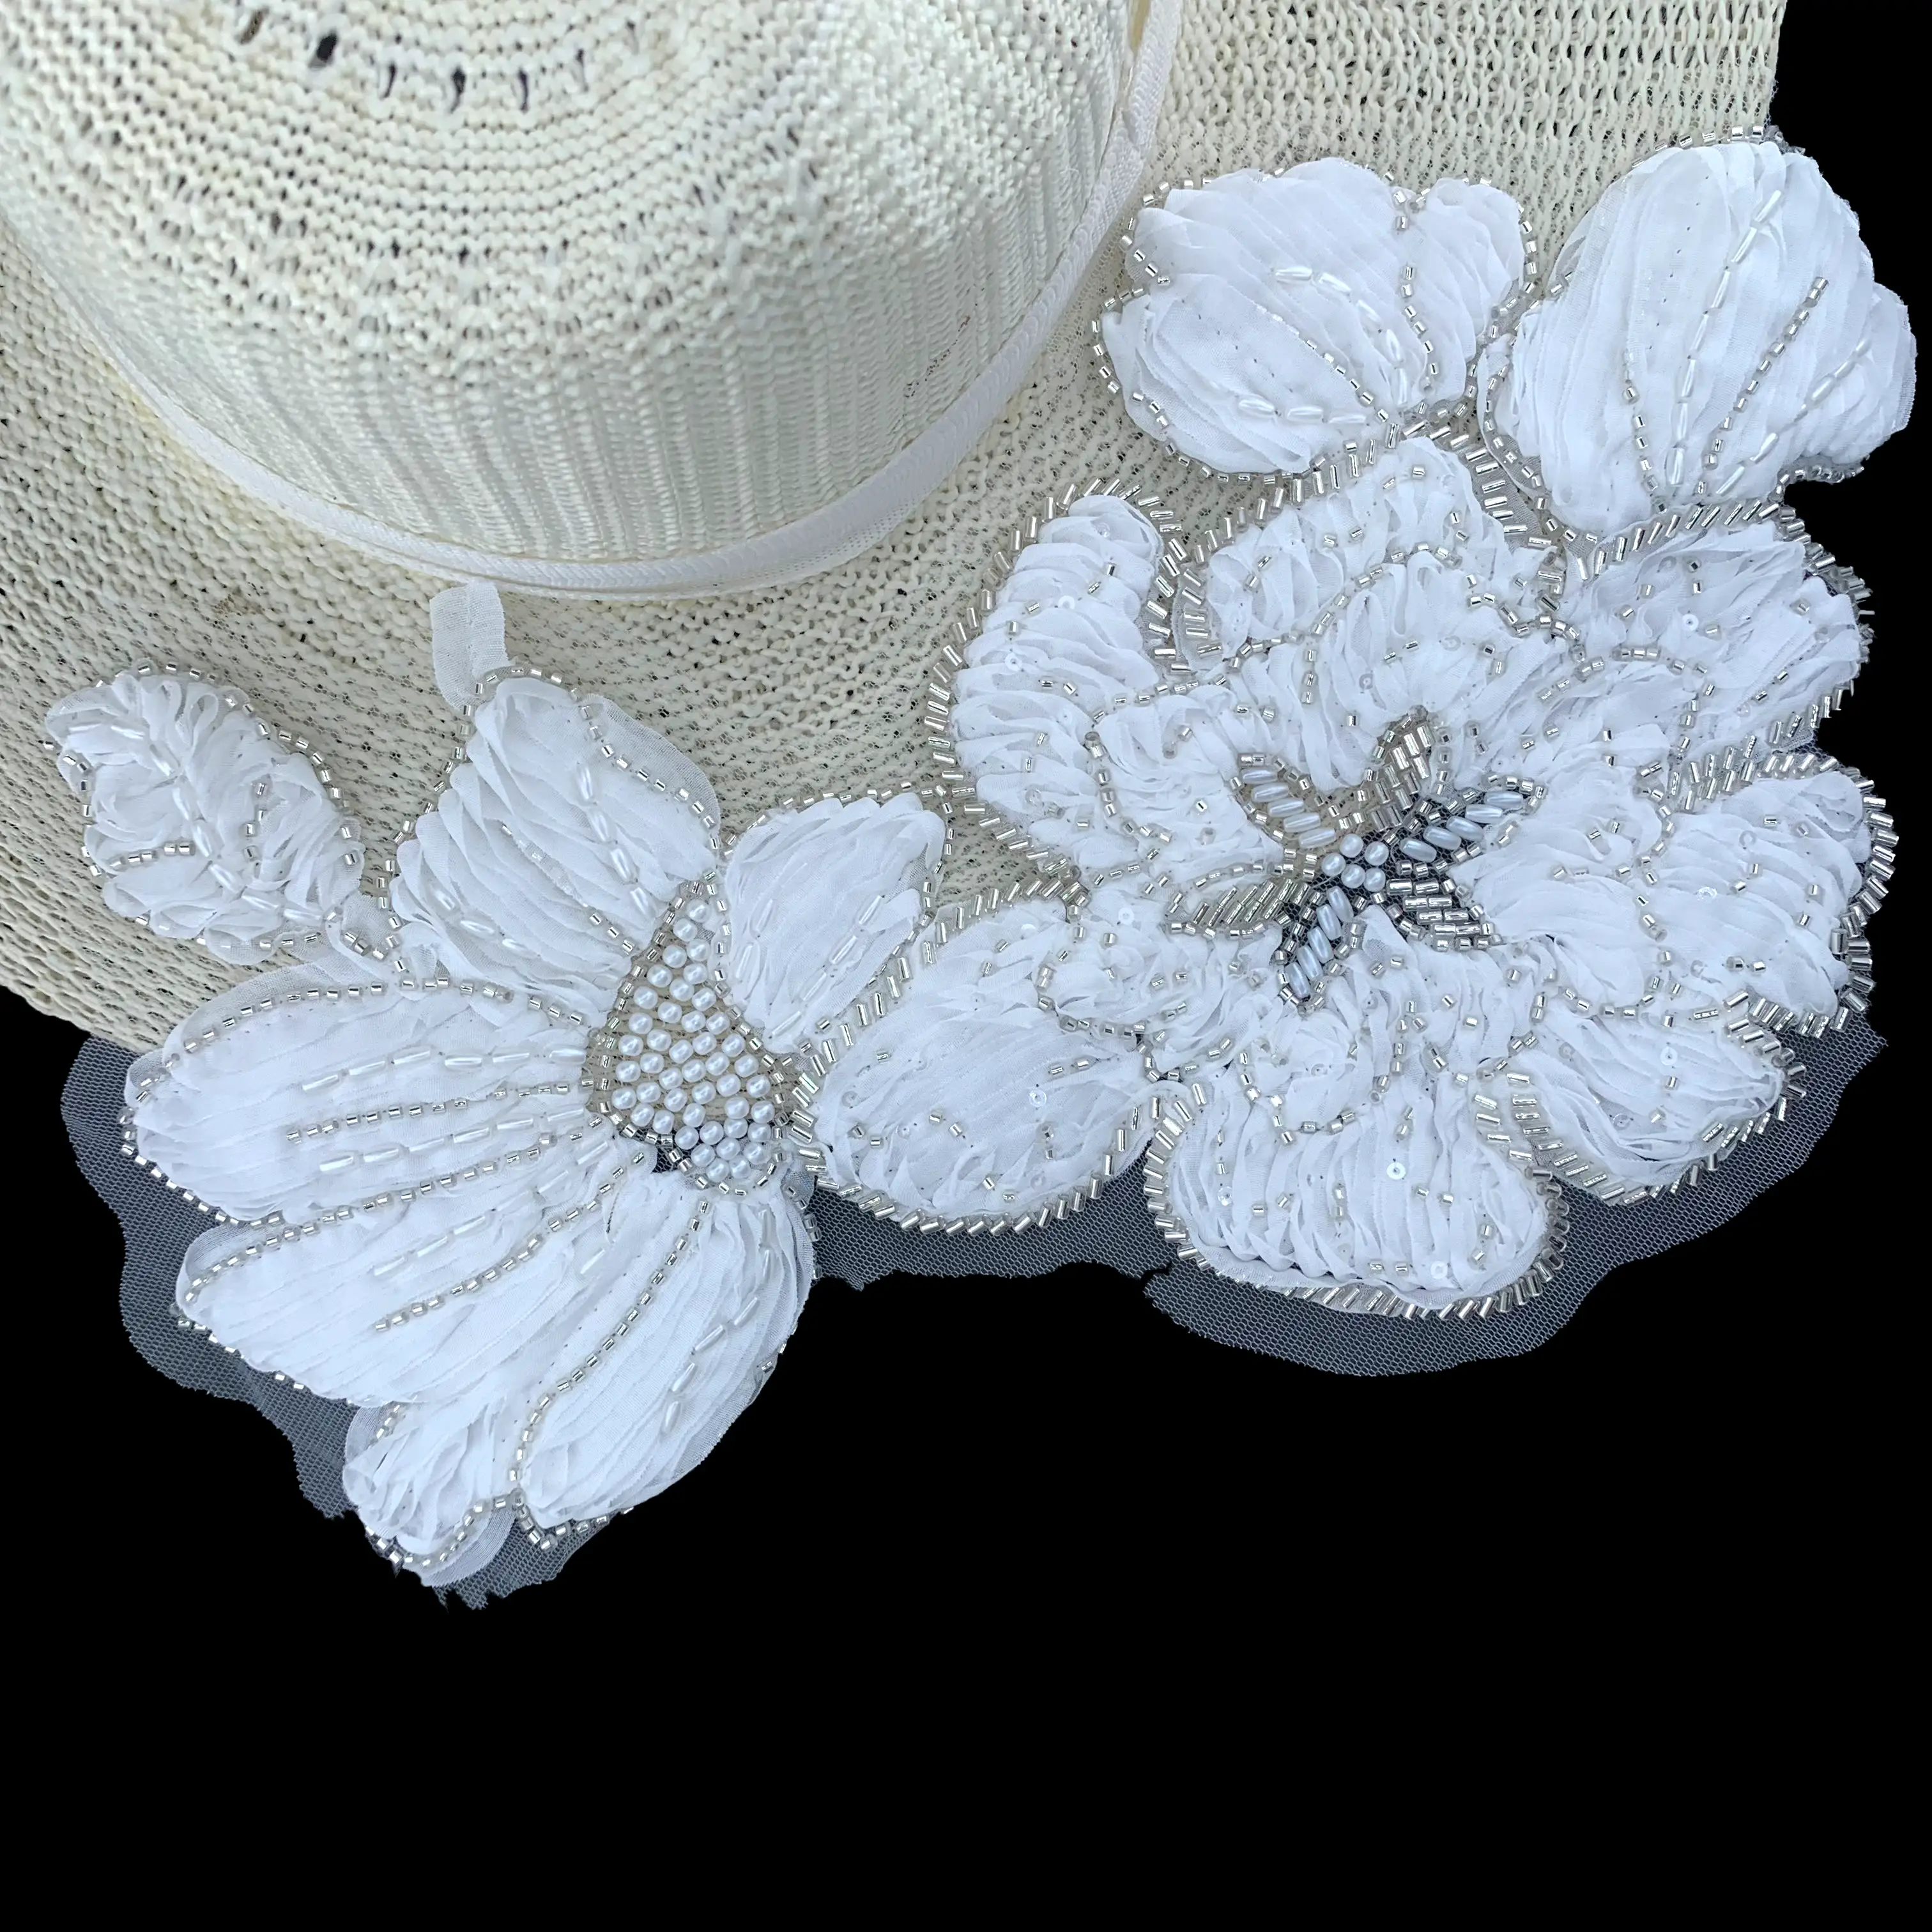
3D floral embroidery describes a raised floral effect, not one single production method. Layered petals, stitched components and bead or sequin details can contribute to that effect. The useful question is how the particular flower is built and attached. A motif that looks attractive flat on a table may need a different arrangement when it crosses a neckline, curves over a shoulder or sits close to a seam.
Separate the raised effect from the construction
Look at the motif from above and from the side. Identify the ground or carrier, any parts lifted from it and the areas holding those parts in place. A layered floral appliqué is not the same construction as a padded stitch or a raised thread texture, even if all are described as 3D. Ask which parts of the offered reference can be developed rather than requesting a general 3D treatment.
The All4Lace double-flower reference combines visibly layered floral details with beads and other decoration. It is a useful appearance example for a shaped appliqué. The photograph does not establish petal fibre, finished dimensions, attachment strength or whether another design can use the same construction unchanged.
Judge the outline in the garment position
For a neckline, compare the outside contour with the neckline curve rather than only measuring the total flower. Note whether leaves or petals extend into the opening, sit on the shoulder or need to remain clear of a fastener. A motif can be visually centred while its practical attachment points fall in inconvenient places.
For a skirt or larger panel, look at the relationship between several motifs. A single isolated flower does not show the spacing, direction and connection of an allover design. Where the flowers will be cut from a wider fabric, discuss how much surrounding ground should remain and how the cut edge will be managed.
Make the attachment area visible
A garment team needs to know where it can stitch through the motif and which parts should remain free to create the raised look. Use a placement drawing to distinguish these areas. Ask for a reverse-side view and an assembled sample where the attachment is new to the team. A frontal photograph alone can hide the practical sewing route.
This is especially useful near an armhole, under a strap or at a closure. The intended movement can bring the decoration into contact with another garment area. Check the assembled placement during ordinary fitting movements and agree what an acceptable result looks like for that design.
Different placements need different views
Choose the sample view according to the decision you are making. More close-up photographs do not automatically answer a placement question.
| Placement | View to request | What it resolves |
|---|---|---|
| Neckline or shoulder | Whole contour over the garment outline | Balance, opening clearance and attachment areas |
| Sleeve or side seam | Motif placed on the assembled curved section | How decoration sits during movement |
| Repeated panel | Several complete motifs and repeat direction | Spacing and cutting arrangement |
| Individual appliqué | Face, reverse and side profile | Contour, attachment and raised parts |
Review the flower after normal handling
Raised parts can lie differently when the material has been folded, packed or handled for sewing. Ask to see how the selected sample is presented and how it looks after the handling expected in your workflow. If petals need shaping, discuss the proposed method with the supplier rather than assuming that pressing or steaming is suitable for every component.
Check colour as a combination of petals, threads, beads, sequins and ground. A photograph can show a pleasing blend while concealing a difference that becomes apparent beside the garment fabric. Review the actual combination together and keep the approved reference identifiable.
Questions about 3D floral embroidery
Does 3D mean the work is handmade? No; appearance does not identify the production method. Can a large flower simply be made smaller? Its outline, components and attachment may need redevelopment, so use the resizing guide for that question. Can any raised flower be cut from an allover fabric and used alone? Check the carrier and connections first. Does a thicker-looking flower always weigh more? A visual impression is not a measured weight comparison.
Discuss your embroidery project
Send All4Lace a front reference and a sketch of the garment position. Mark any petals or leaves that should remain raised, together with the required contour, so the sample discussion can focus on the flower you actually need.
Contact Zhijin