Materials & Applications
Embroidered Jacket Panels: Placement, Contact and Assembly Review
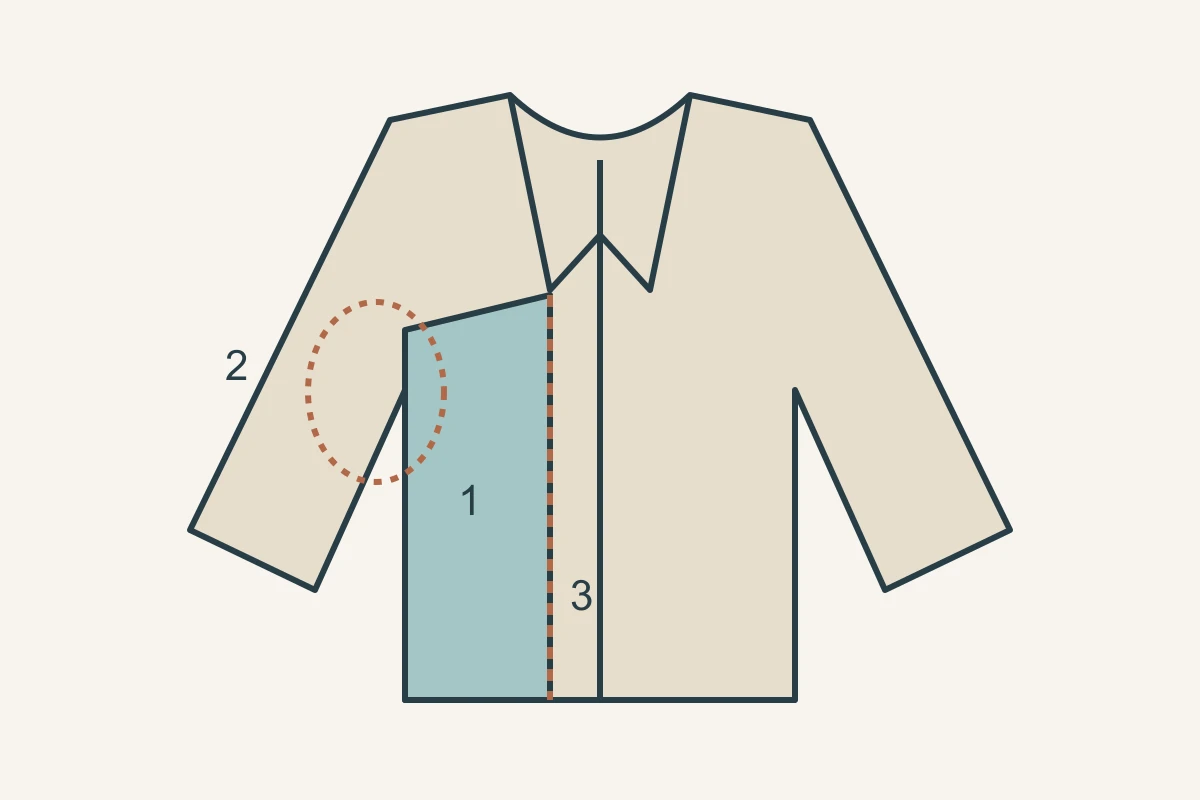
Select an embroidered jacket panel as part of the jacket assembly, not as an isolated decorated rectangle. Identify whether it replaces a garment piece, overlays it or supplies a smaller decorative section. Then review its boundaries, the surrounding fabric and the places that meet arms, straps or closures. This guide turns a visual preference into a panel brief without assuming that appearance proves suitability for wear.
Define what the embroidered piece must do
Mark the proposed piece on a front and back garment drawing and connect it to a pattern reference. State whether the embroidery covers the full panel or only a marked area. List the intended underlying layers separately, including any facing or lining at the boundary. A decoration reference does not establish the construction of the complete jacket.
Keep the garment’s fit and support requirements with the garment maker. If the proposed panel replaces an existing piece, the review needs the actual substitute fabric and assembly. If it is an overlay, show both layers together. These are different proposals even when the same embroidery design is visible from outside.
Place the design around real garment features
Use the finished seamline to locate the embroidery, then add pockets, lapels, buttons or a zip to the review drawing. A flower centred on an empty rectangle may sit behind a lapel once the jacket is closed. View the jacket both open and fastened before selecting which areas deserve the strongest motif.
For paired fronts or sleeves, identify whether matching means mirrored placement, the same repeat position or simply a coordinated impression. Mark the fabric face and viewing direction. Do not turn the fabric over merely because the paper pattern has been mirrored; the reverse may not reproduce the approved surface.
Make a contact map rather than guessing durability
Choose review locations from the intended use of this jacket. Observe the actual sample with the planned undergarment and accessories, recording what touches what during ordinary movements. Contact at a particular location is a question to assess, not evidence that the embroidery will fail or that it has passed a wear test.
Record any catching, uncomfortable contact or visible change with its location and conditions. An informal fitting review does not replace an agreed laboratory test when a performance requirement exists. Keep the observation, the desired result and any later test requirement in separate fields.
| Location | Review with | Record without assuming |
|---|---|---|
| Underarm and side | Sleeve moving beside the body panel | Where surfaces touch or catch |
| Shoulder | Intended bag strap, if relevant | Strap position and observed contact |
| Front closure | Actual zip, button or fastening | Clearance and decoration beside the closure |
| Pocket edge | Hand entering the proposed pocket | Access and contact at the opening |
| Cuff and lower edge | Neighbouring garments and intended layers | Exposed decoration and wearer comments |
Resolve junctions in an assembled section
Closet Core’s original jacket sleeve tutorial checks pattern notches and left/right orientation and uses a preliminary sewn check before final stitching. The transferable point here is to review the correctly identified assembly. Its notch convention and sewing measurements belong to that pattern, so they should not be copied as universal settings for an embroidered jacket.
A useful sample section includes the decoration, neighbouring fabric and the proposed inside finish. Inspect both sides of a join and the intersections near an armhole, facing or pocket. Let the garment maker establish suitable sewing and pressing settings with the actual materials. A catalogue photo cannot confirm those settings or the finished junction.
Technical references
A hypothetical cropped jacket: separate layout from contact
Imagine a cropped jacket with an embroidered side-front panel and a plain sleeve. The first mock-up shows the intended flower when open, but the lapel hides its centre when fastened. The team shifts the motif and approves a new placement photograph. That settles a layout question; it says nothing about the arm moving against the panel.
During the next fitting, the maker records contact between the sleeve and raised decoration at the side. The team can reconsider the decorated area, the panel location or the material choice, then review the revised assembly. This fictional sequence is not a customer case, a promised remedy or evidence of testing on an All4Lace product.
Keep the order scope tied to the reviewed version
Record the fabric reference, motif map, pattern version, layer references and sewn sample identifier together. Specify which parts are approved and which remain open, including any agreed performance requirement. If a pocket, closure or panel boundary moves, check its relationship with the embroidery again instead of treating the old photograph as approval.
State whether the order covers fabric by length, placed panels or another agreed supply form, and who is responsible for cutting and jacket assembly. Confirm usable layout before converting panel counts into fabric quantity. Do not infer stock, cutting yield, washability or abrasion performance from the decorative design or from this schematic.
Discuss your embroidery project
Send All4Lace your marked jacket panel pattern, embroidery reference and layer plan to discuss fabric sampling with the panel boundaries and assembly scope clearly defined.
Contact Zhijin