Customization & Sampling
Embroidery Density vs Stitch Count: Read the File and the Fabric
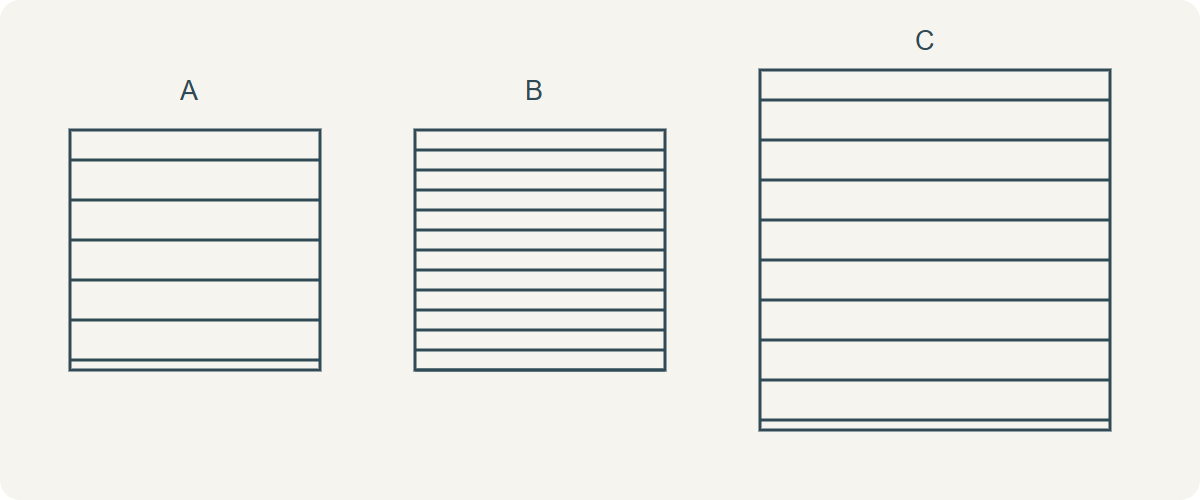
Stitch count is a total for a stated design or repeat. Density describes how closely stitches occupy a local region, often controlled by row spacing for a fill. A larger motif can contain more stitches without being more densely filled. Compare the actual size, stitch types, spacing and layers before judging quality or price; a total count alone cannot establish coverage, softness, machine time or the suitability of a lace ground.
Separate total, spacing and visible coverage
A design can include running stitches, satin columns, filled areas, underlay, travel and securing sequences. Its reported total combines what the file or machine format counts within the selected scope. Ask whether a count is for one flower, one repeat, one complete panel or a multi-repeat production arrangement. Also state whether trims and jumps are listed separately; software and machine reports do not always use identical labels.
Local fill density is not the proportion of the whole cloth covered by flowers. A sparse allover layout can contain tightly filled flowers; a nearly continuous decorative surface can use open stitches. Ask for a close view and an overall repeat view. A buyer needing an airy sleeve must specify its structural openings and underlayers as well as the visual coverage.
Read what the software’s number actually means
Hatch’s official Adjust Stitch Spacing command uses larger spacing to reduce density. Consequently a larger number can mean less dense stitching when the field is distance between rows. Other interfaces may express a percentage, stitches per distance or a stitch-type-specific control. Confirm the field name, unit, software version and selected objects before comparing screenshots. “Increase density to 0.5” is ambiguous without those details.
Even correctly recorded row spacing does not describe stitch length along each row, underlay or overlapping objects. A dense crossing can occur where two acceptable objects overlap. Inspect those intersections and the underside rather than accepting a global average. In open net, the needle landings and anchoring path also matter: a dense-looking surface is not proof of connected support.
Technical references
An area example that does not pretend to be a stitch file
Hypothetical geometry: fill A is 20 mm wide and 20 mm high. Parallel rows are 0.4 mm apart and the idealised segment length along each row is 2 mm. Ignoring boundaries and all other stitches, an approximate segment count is area ÷ (row spacing × segment length): 400 ÷ (0.4 × 2) = 500. This intentionally simplified model excludes row ends, underlay, travel, tie-ins, short stitches and overlaps. It is not a digitising prescription or a price calculation.
Keep spacing and segment length unchanged but double the width to 40 mm: area becomes 800 mm² and the model gives 1000 segments. The local spacing is unchanged although the total doubles. Instead keep the original 20 × 20 mm area and halve spacing to 0.2 mm: the same model also gives 1000. Identical totals can therefore describe different area-and-spacing combinations, even before real embroidery complexity is added.
| Illustrative case | Area | Row spacing | Model segments |
|---|---|---|---|
| A | 400 mm² | 0.4 mm | 500 |
| Larger shape | 800 mm² | 0.4 mm | 1000 |
| Closer rows | 400 mm² | 0.2 mm | 1000 |
Distinguish regenerated objects from moved stitches
Hatch’s official object-scaling documentation says stitches regenerate to preserve current spacing. That is not the same as merely moving existing needle points farther apart. When reviewing a size change, ask whether the editable objects were regenerated, the file was processed by a stitch-resizing tool, or positions were simply scaled. Retain the resulting file revision and count report, then examine the output instead of assuming the command name guarantees quality.
A small flower enlarged into a bodice panel can also change acceptable satin span, edge definition and unsupported travel. Revisit the digitising structure, not just a percentage. Likewise, shrinking can crowd penetrations or erase fine spaces. The changed physical size must be checked on its intended ground and backing, including removal of any temporary support.
Technical references
Change one cause on an identified stitch-out
Prepare a baseline with known design revision, finished size, thread, needle, ground, backing and finishing. Madeira’s puckering guidance identifies several interacting factors; density alone cannot diagnose every wrinkle. If a region is stiff or perforated, stop adding stitches. Compare a new trial changing the suspected object spacing or overlap while keeping the other recorded conditions stable.
If coverage is insufficient, first inspect whether the ground is showing through because of spacing, thread thickness, colour contrast, shifted registration or the intended open pattern. Increasing density can worsen a weak ground. Check the relaxed front, reverse, edges and joined garment area; a stiff swatch can look richly covered while failing the garment’s movement requirement.
Technical references
Use count as one quotation input, not a time equation
Machine time also depends on actual running conditions, colour changes, trims, stops, handling and the production arrangement. Dividing stitches by a nominal maximum speed excludes these and cannot promise delivery. For comparing proposals, align finished size, repeat scope, ground, visible result and required processing. Then ask what the quotation includes and which accepted sample defines the outcome.
Keep a review record with file identifier, counted scope, software/format, dimensions, local spacing changes, thread reference and stitched outcome. A proposal with fewer stitches can be better or worse depending on the design; a higher count can represent larger area rather than higher quality. The accepted evidence is the traceable file and appropriate physical sample against agreed requirements, not the largest number on a specification sheet.
Discuss your embroidery project
For an All4Lace embroidery development enquiry, send the intended finished dimensions, ground, artwork and the balance of coverage versus softness you need. If a stitch file exists, include its revision and an identified stitch-out rather than only a total stitch count.
Contact Zhijin